
Wood Flooring Supply & Installation
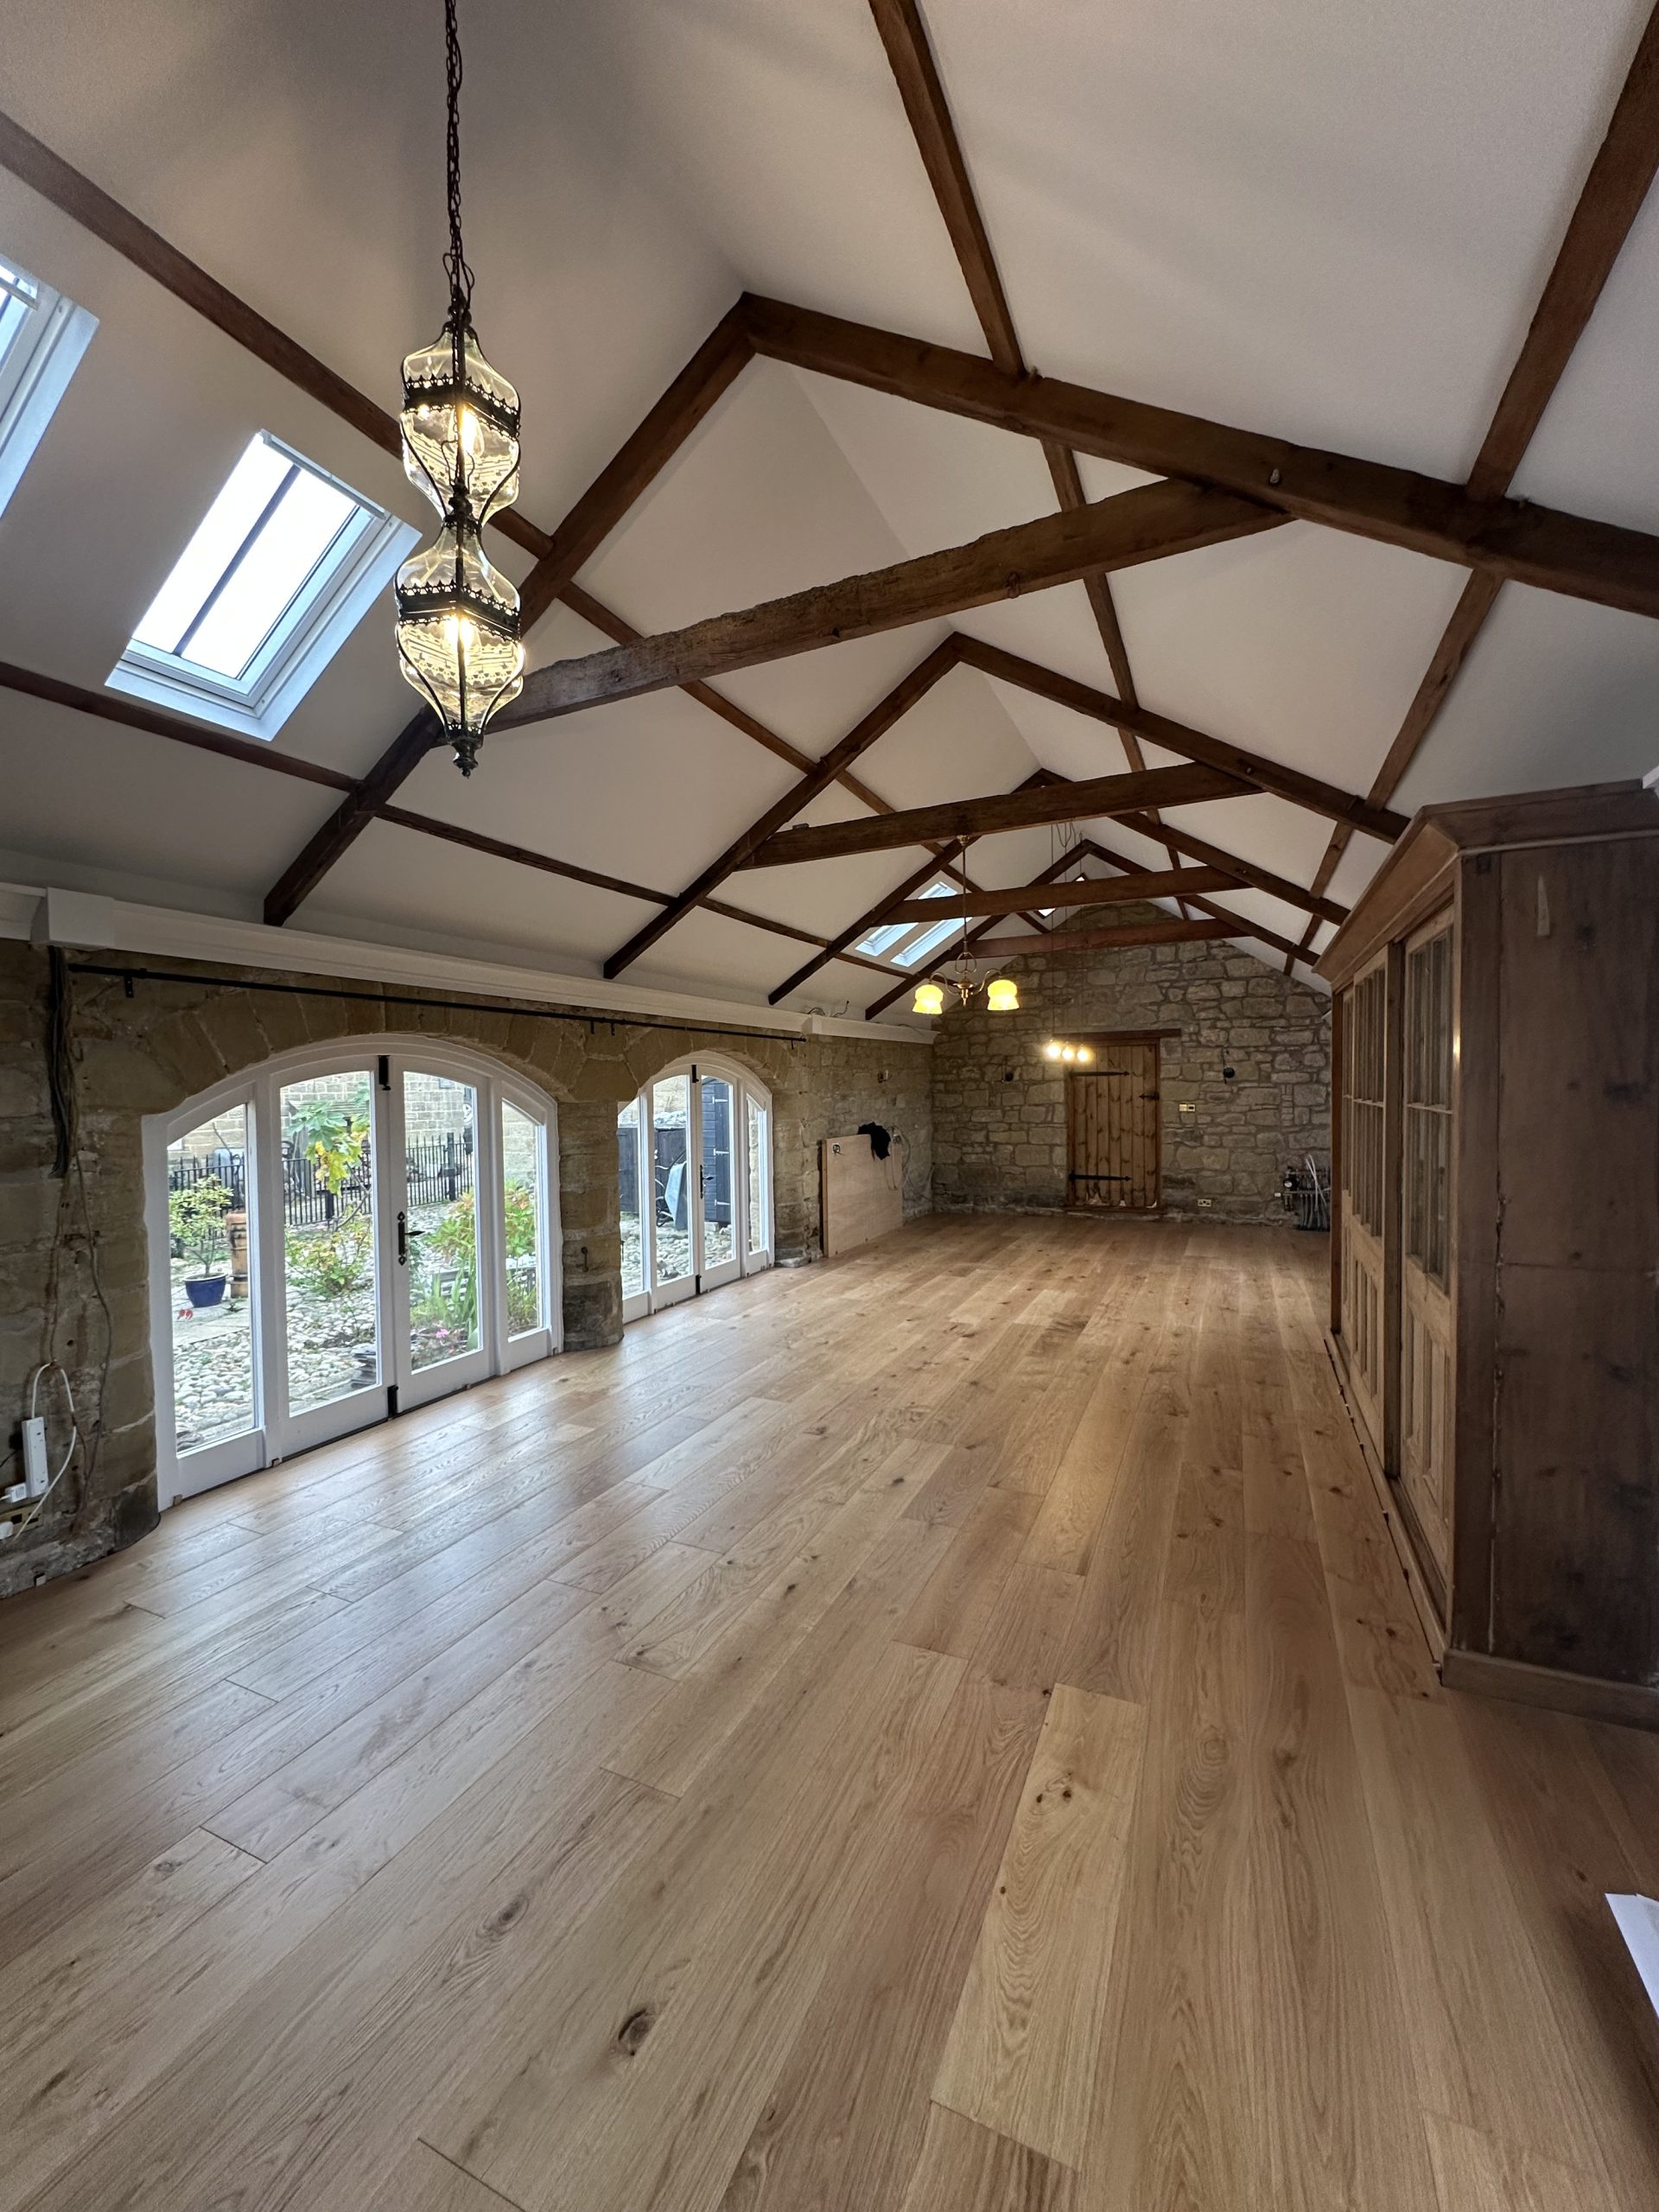
We provide wood floor installation across Newcastle, Northumberland and the wider North East, supplying both prefinished and unfinished solid and engineered flooring. This includes wide-plank flooring and parquet patterns such as herringbone. Unfinished floors are sanded, coloured to specification and finished on site as part of the installation.
Unfinished Wood Flooring, Finished on Site
Unfinished wood flooring allows the installation and finishing to be treated as one complete process. The timber is fitted in its raw state, whether as wide plank, herringbone or another parquet pattern, before the entire floor is sanded and finished on site.
Working this way gives far greater control over the finished appearance. The natural character of the timber can be retained, the colour can be adjusted where required, and the final oil or lacquer chosen around the way the floor needs to look and perform in the room. It also means borders, inlays and other bespoke details can be finished as part of the same floor rather than treated as separate components.
We regularly work with unfinished solid and engineered flooring for both straightforward installations and more individual schemes. Some floors are kept very natural; others are coloured or developed around a particular interior. The important part is that the finish is decided as part of the overall floor, rather than being limited to a factory-applied option selected before installation.
Prefinished Wood Flooring
Prefinished flooring arrives with the colour and protective finish already applied at the factory, so the appearance of the floor is established before installation begins. It is available across a wide range of engineered and solid wood floors, including plank and parquet formats, with different grades, textures, colours and surface finishes.
It can be a good choice where the required finish is already available as a manufactured product or where reducing the amount of sanding and finishing carried out in the property is important. Once installed, the floor is essentially complete, without the additional stages needed for an unfinished floor.
The choice between prefinished and unfinished flooring is not simply about appearance. The construction of the floor, subfloor, room conditions, installation method and the detail required around thresholds, borders and adjoining areas all need to be considered. We can supply and install either approach and advise on which is better suited to the particular project.
The Timber We Supply
We supply both solid and engineered wood flooring, with the specification chosen around the property, subfloor, finished floor height, pattern, board dimensions and the appearance required. We are not tied to a single manufacturer or range, so the timber can be selected to suit the individual project rather than the project being made to fit a particular product.
With engineered flooring, 4mm of real timber is our minimum wear layer. The purpose of an engineered board is to combine the stability of its construction with the long-term advantages of a genuine wood surface. If that surface layer becomes too thin, much of the benefit of choosing a timber floor in the first place is lost because there is considerably less material available for future sanding and refinishing.
Solid timber remains equally relevant where it suits the construction and the floor being created. We work with both solid and engineered flooring across plank and parquet installations, including floors supplied unfinished for sanding, colouring and finishing after installation.
Grade is considered as carefully as construction. Prime timber gives a cleaner, more consistent appearance, while rustic grades deliberately retain more knots, colour variation and natural character. Rustic is not a uniform standard between suppliers, however, so we are selective about where we source it. In particular, we look at the amount and distribution of sapwood, filling, knots and colour variation rather than accepting a grade description on its own.
Species, grade, dimensions, construction and finish are therefore considered together when we specify the flooring for a project.
From Preparation to Finished Floor
A wood floor installation is planned around what is already in the building. Before fitting begins we consider the subfloor, moisture conditions, finished floor height, adjoining surfaces, the direction or pattern of the floor, thresholds and any borders or other details that need to be resolved. The preparation and installation method then follows from those conditions rather than from a fixed approach.
Subfloor Preparation
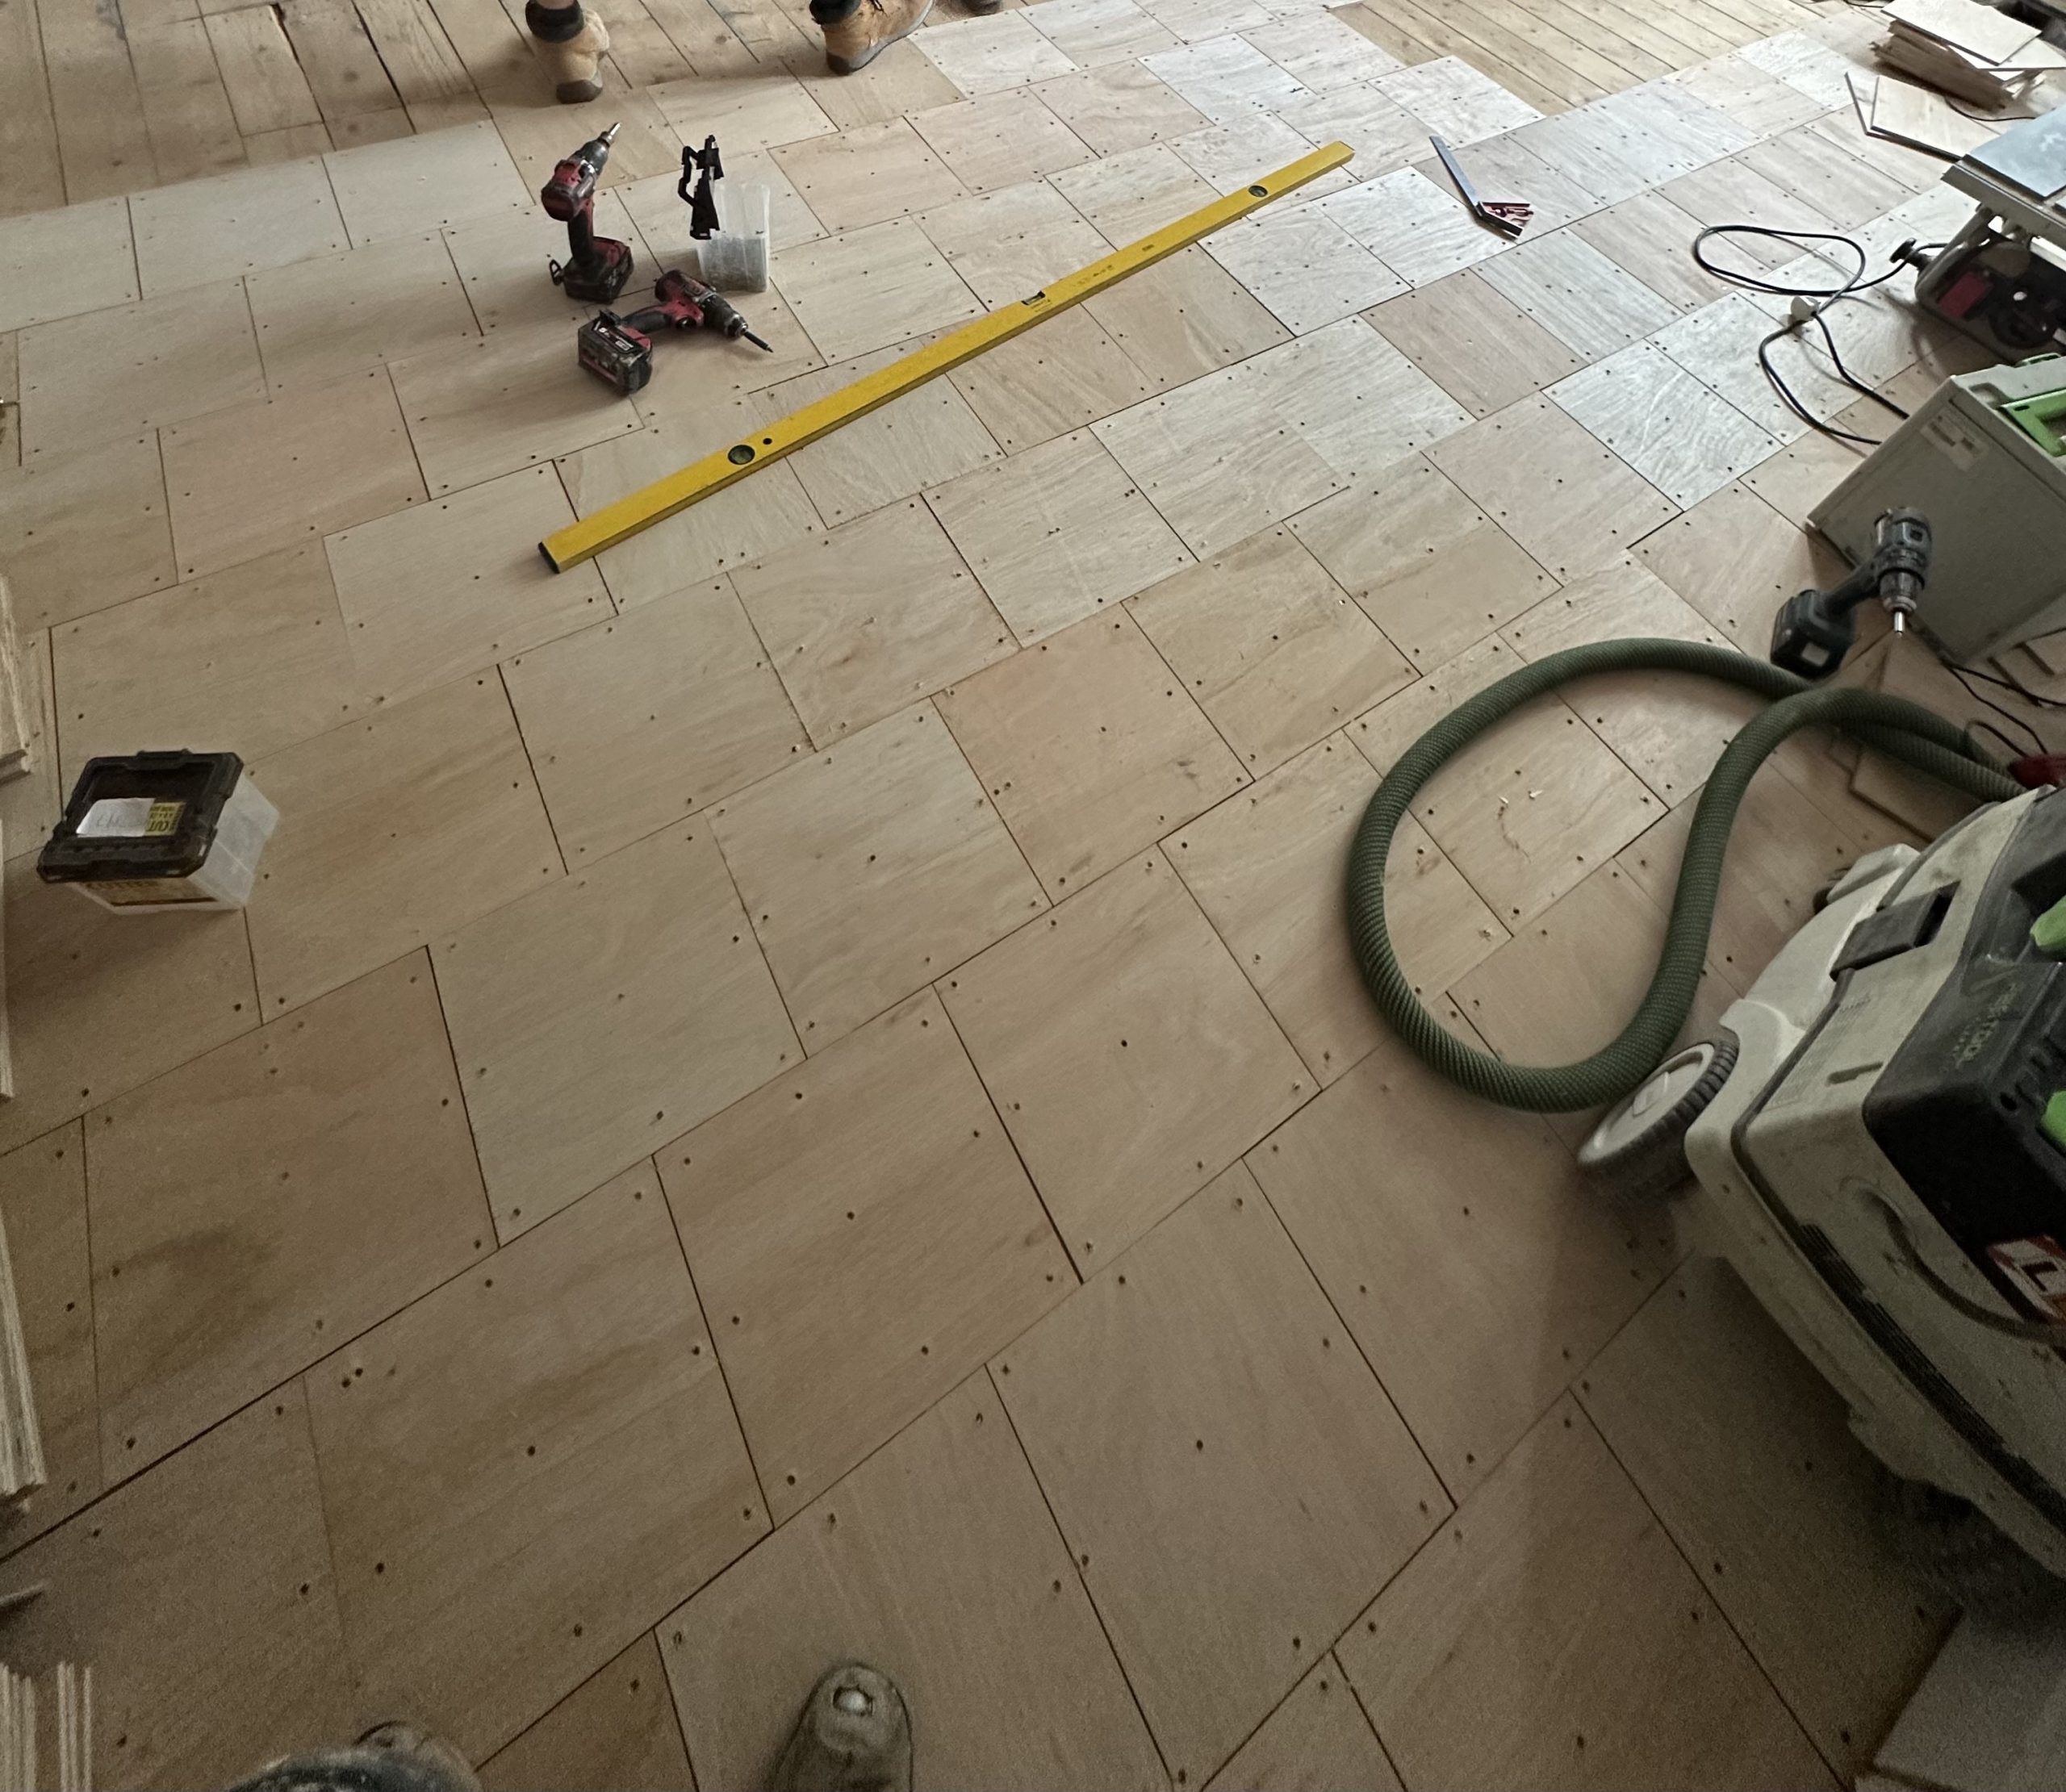
The finished floor can only be as good as the surface beneath it. Before installation, the existing base is assessed for its construction, condition, moisture and flatness, with the preparation specified around both the property and the flooring being installed.
Depending on the project, this can include a plywood overlay installed in smaller sections over timber or screeded subfloors where appropriate. Dividing the plywood into smaller sections helps accommodate the natural movement of the wood flooring rather than creating one large continuous sheet beneath it. Once installed, the plywood is sanded to remove any slight variation between sections and to create as flat and consistent a surface as possible before the flooring is laid.
Setting Out Parquet & Patterned Floors
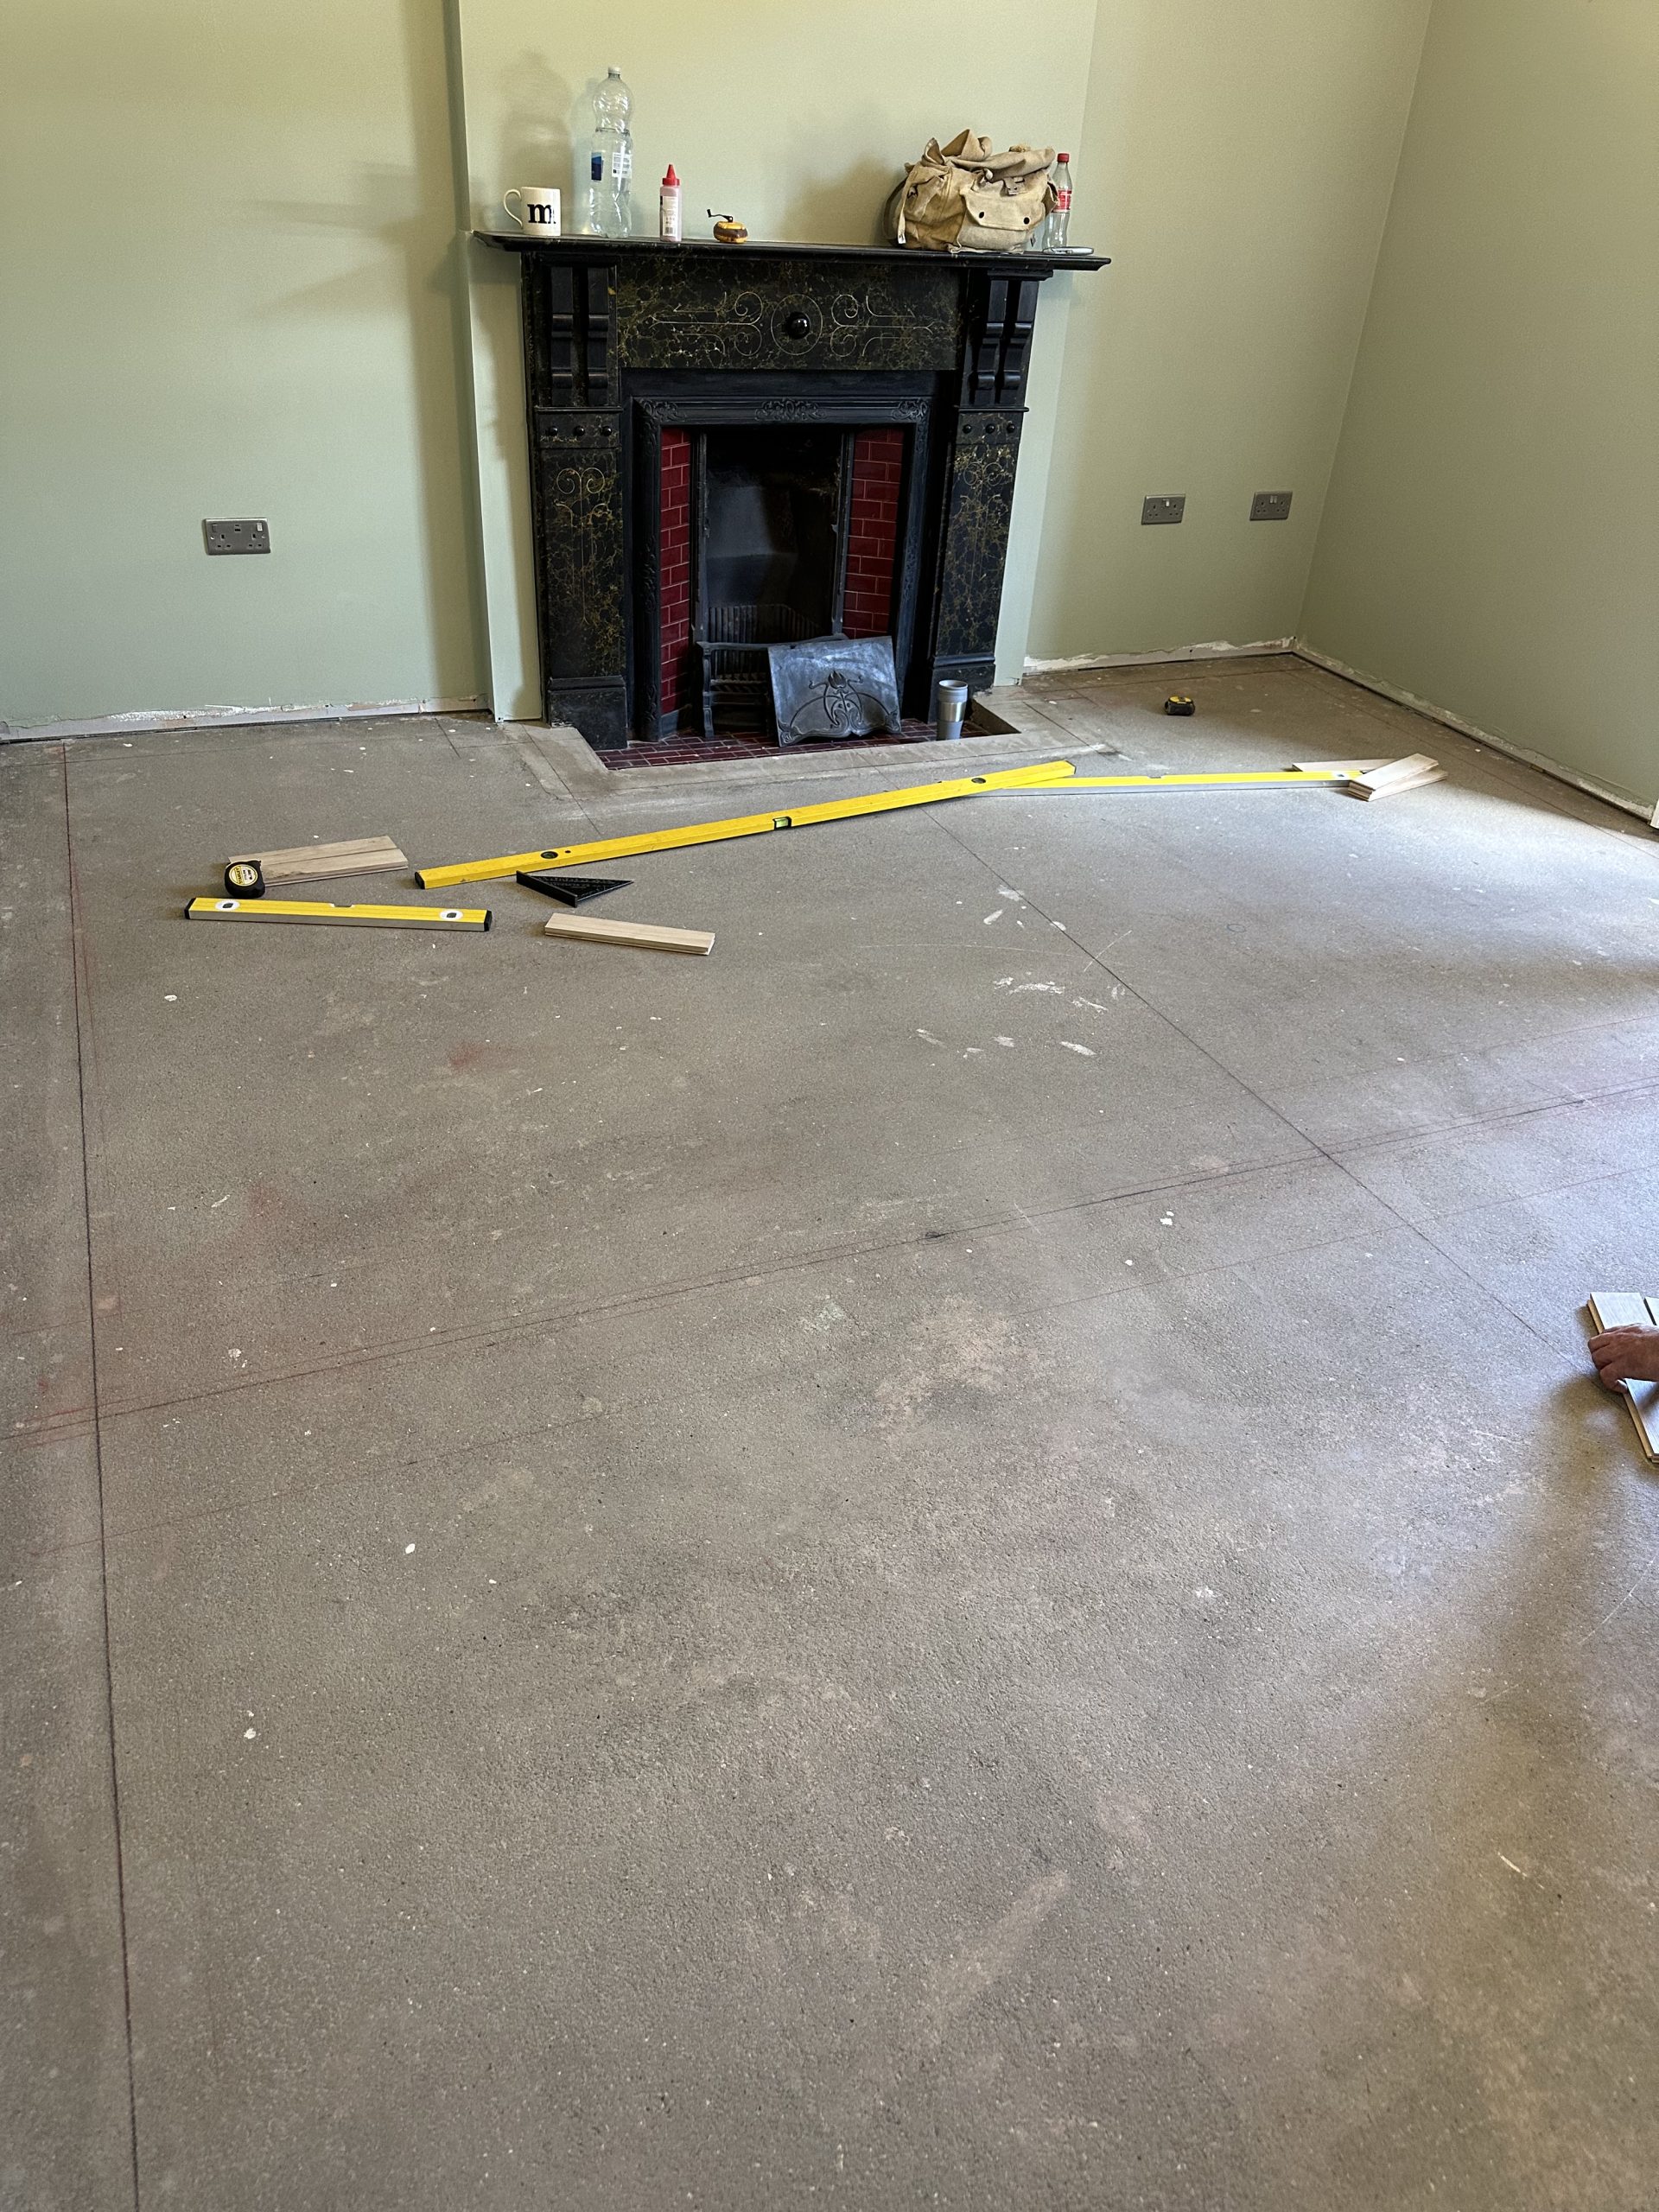
For parquet and other patterned floors with borders, setting out is completed before the field is installed. Rooms are rarely perfectly square and walls are rarely perfectly straight, so the geometric centre of the room is only the starting point. The objective is to make the finished pattern appear straight and balanced within the space, even where the building itself is not.
We establish an initial centre line and construct a true perpendicular line through it using intersecting arcs, creating an accurate datum independent of the surrounding walls. The room is then checked from those references and the position of the field can be adjusted where necessary. This allows the pattern to remain visually consistent along the principal walls rather than gradually narrowing or widening as it follows an irregular room.
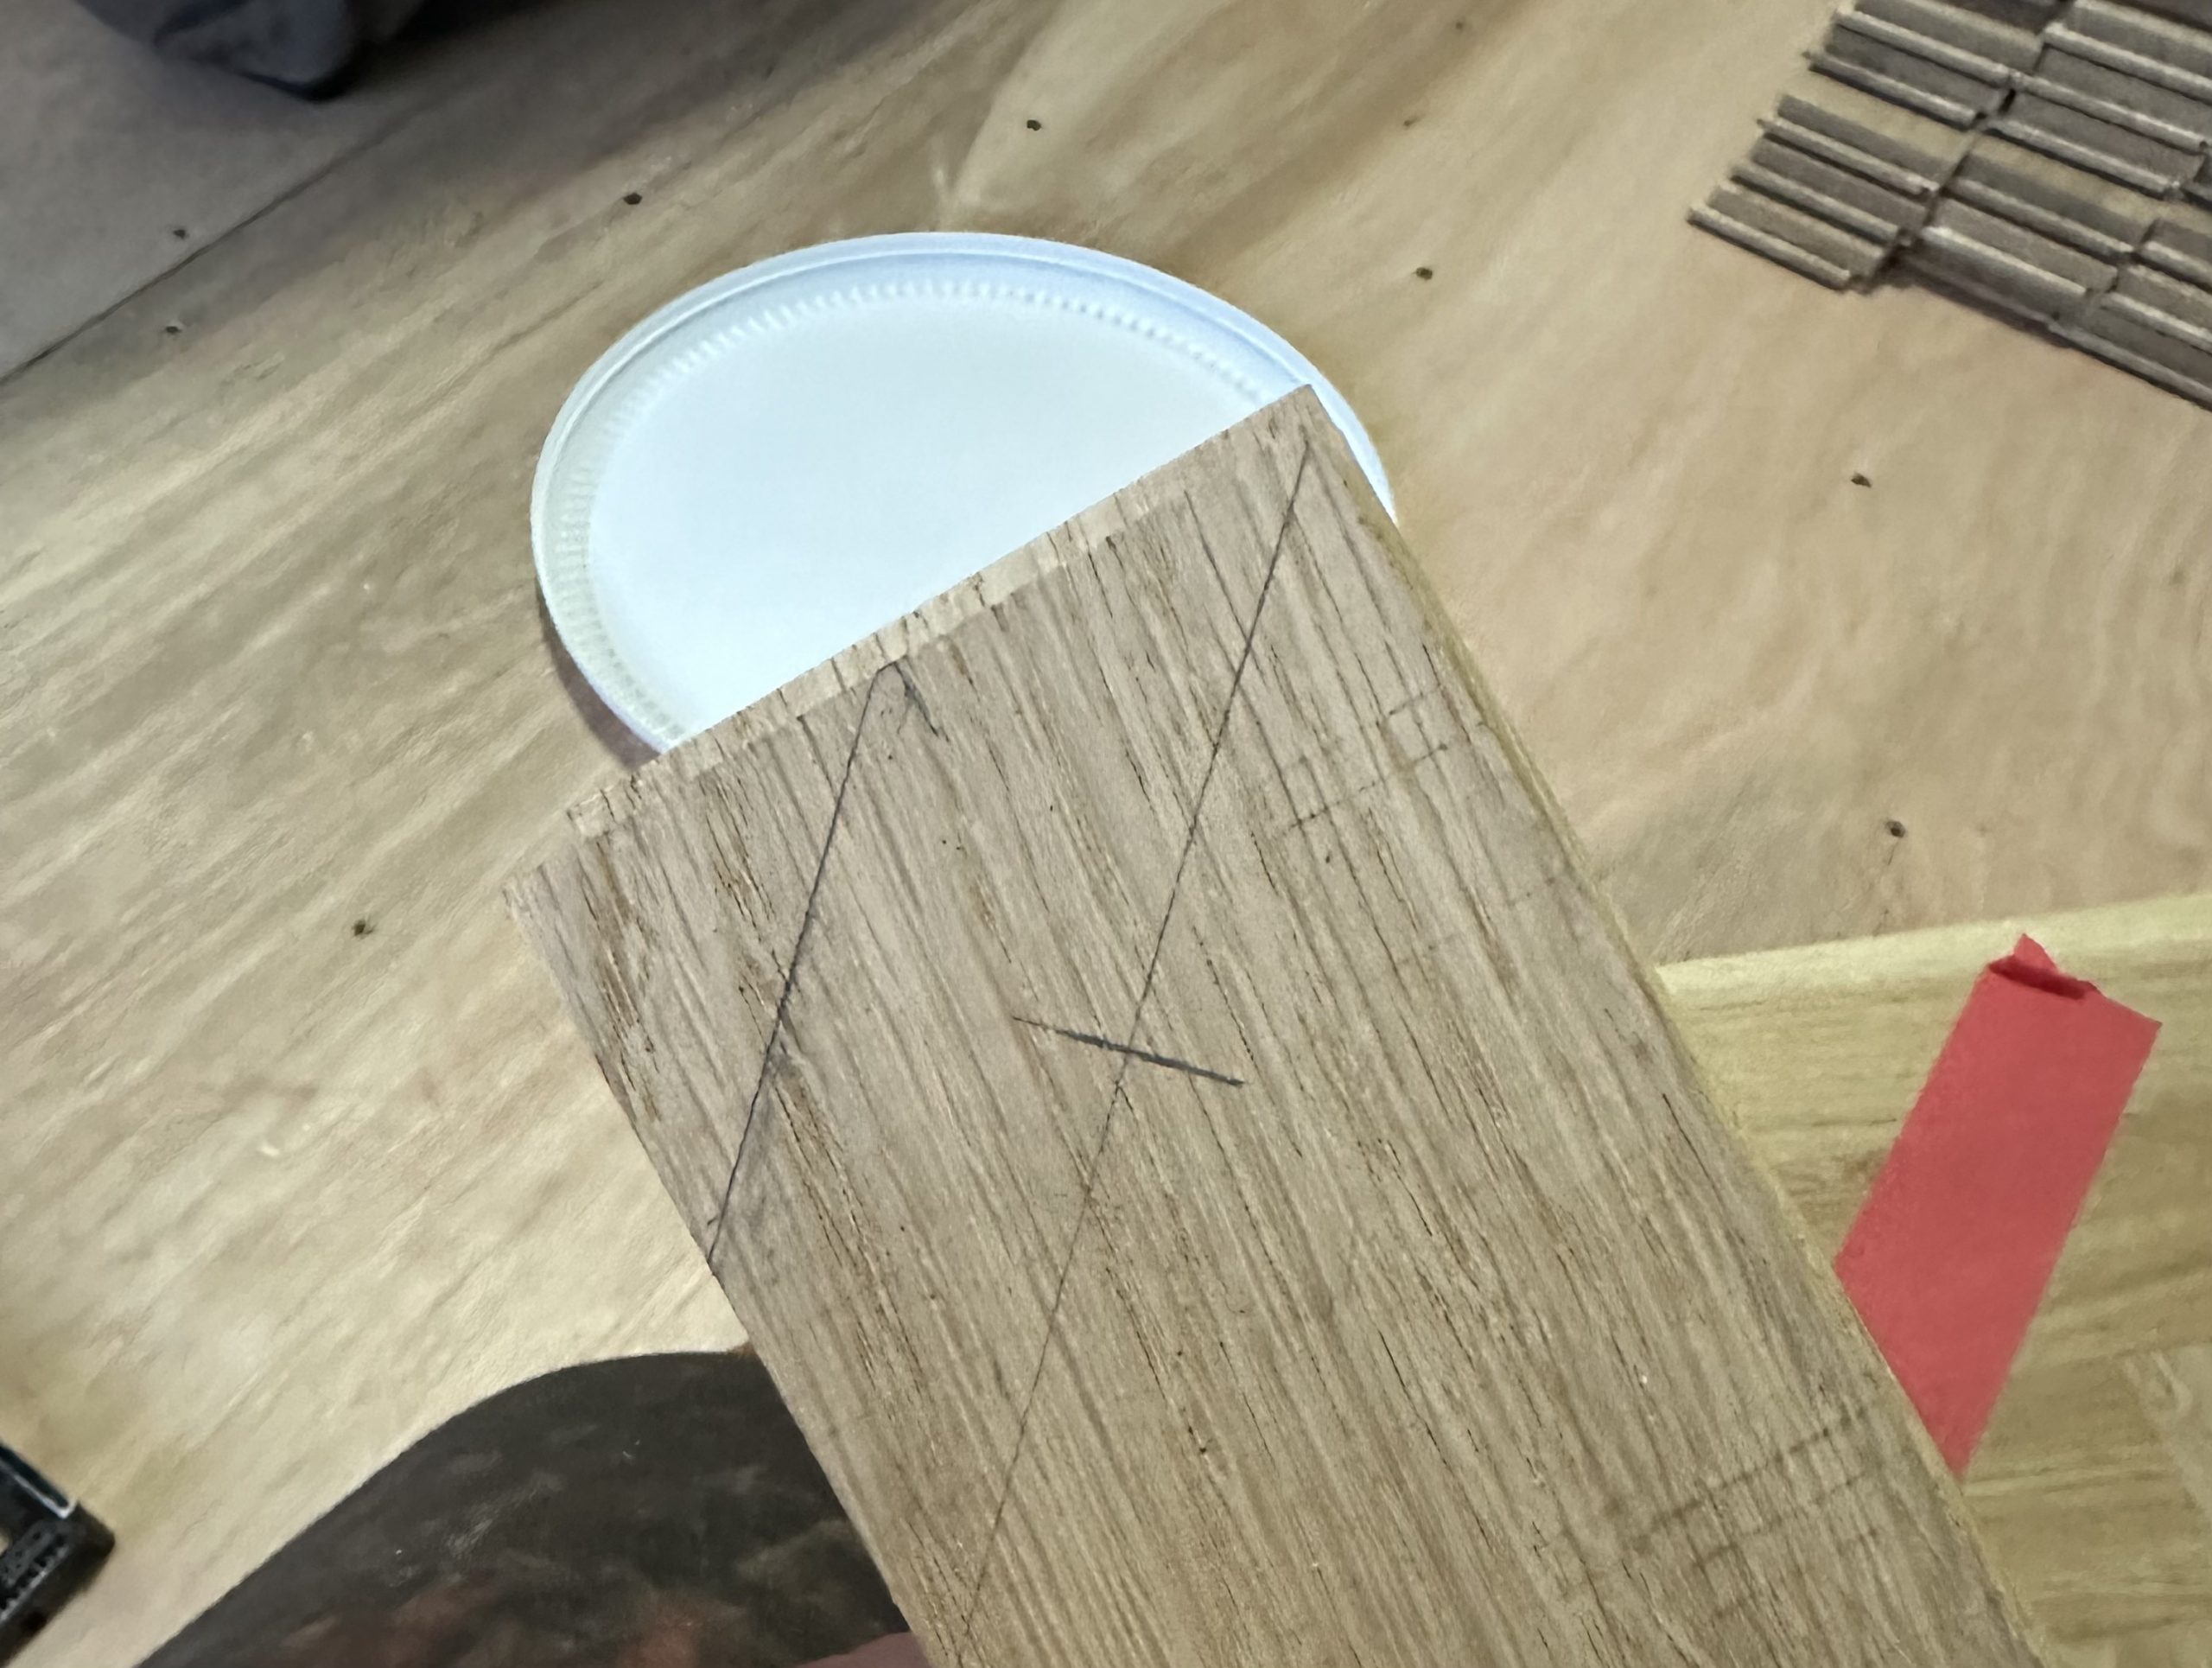
For herringbone, working lines are then established from the starting block itself. Using a set square, a series of reference points are marked through the centre of the pattern and transferred onto the prepared floor. As installation progresses, alternate points of the herringbone are kept to these working lines. This keeps the pattern straight over distance and ensures that it begins from the true centre of the design, so the corresponding cuts at opposing sides of the room remain equal rather than one side progressively becoming larger than the other.
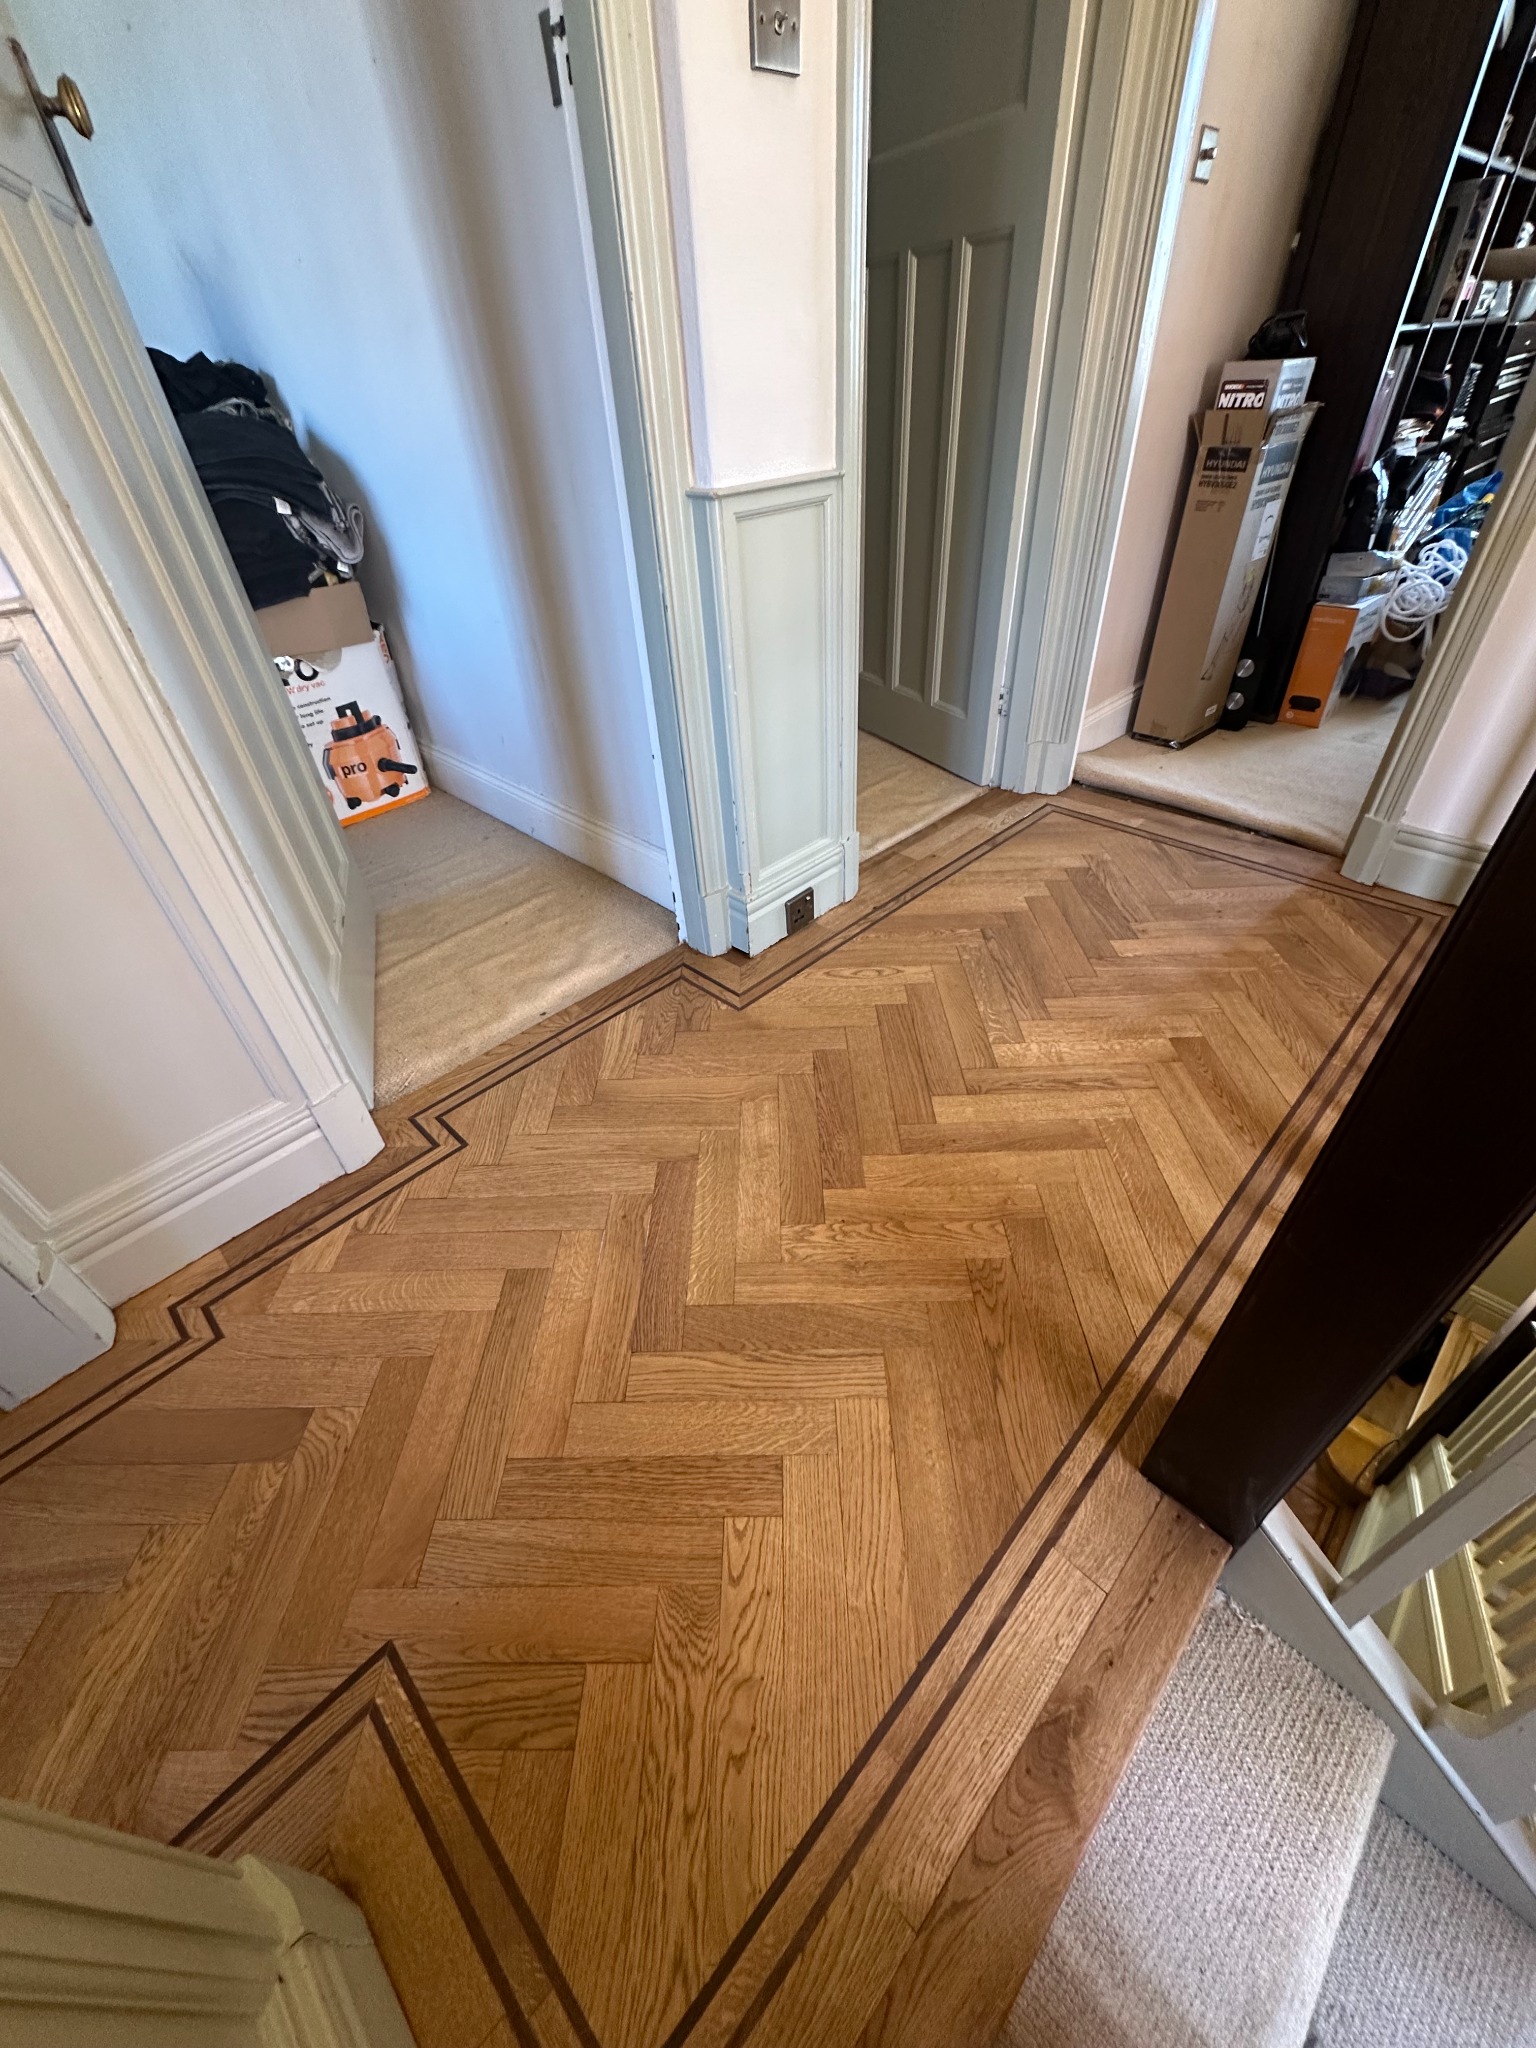
The field and border are therefore set out together. Border positions can be adjusted independently of irregular walls, and corners are planned so that mitres resolve at 45 degrees and the border blocks meet correctly. Only once that geometry has been established does installation of the main field begin.
Establishing the Crown
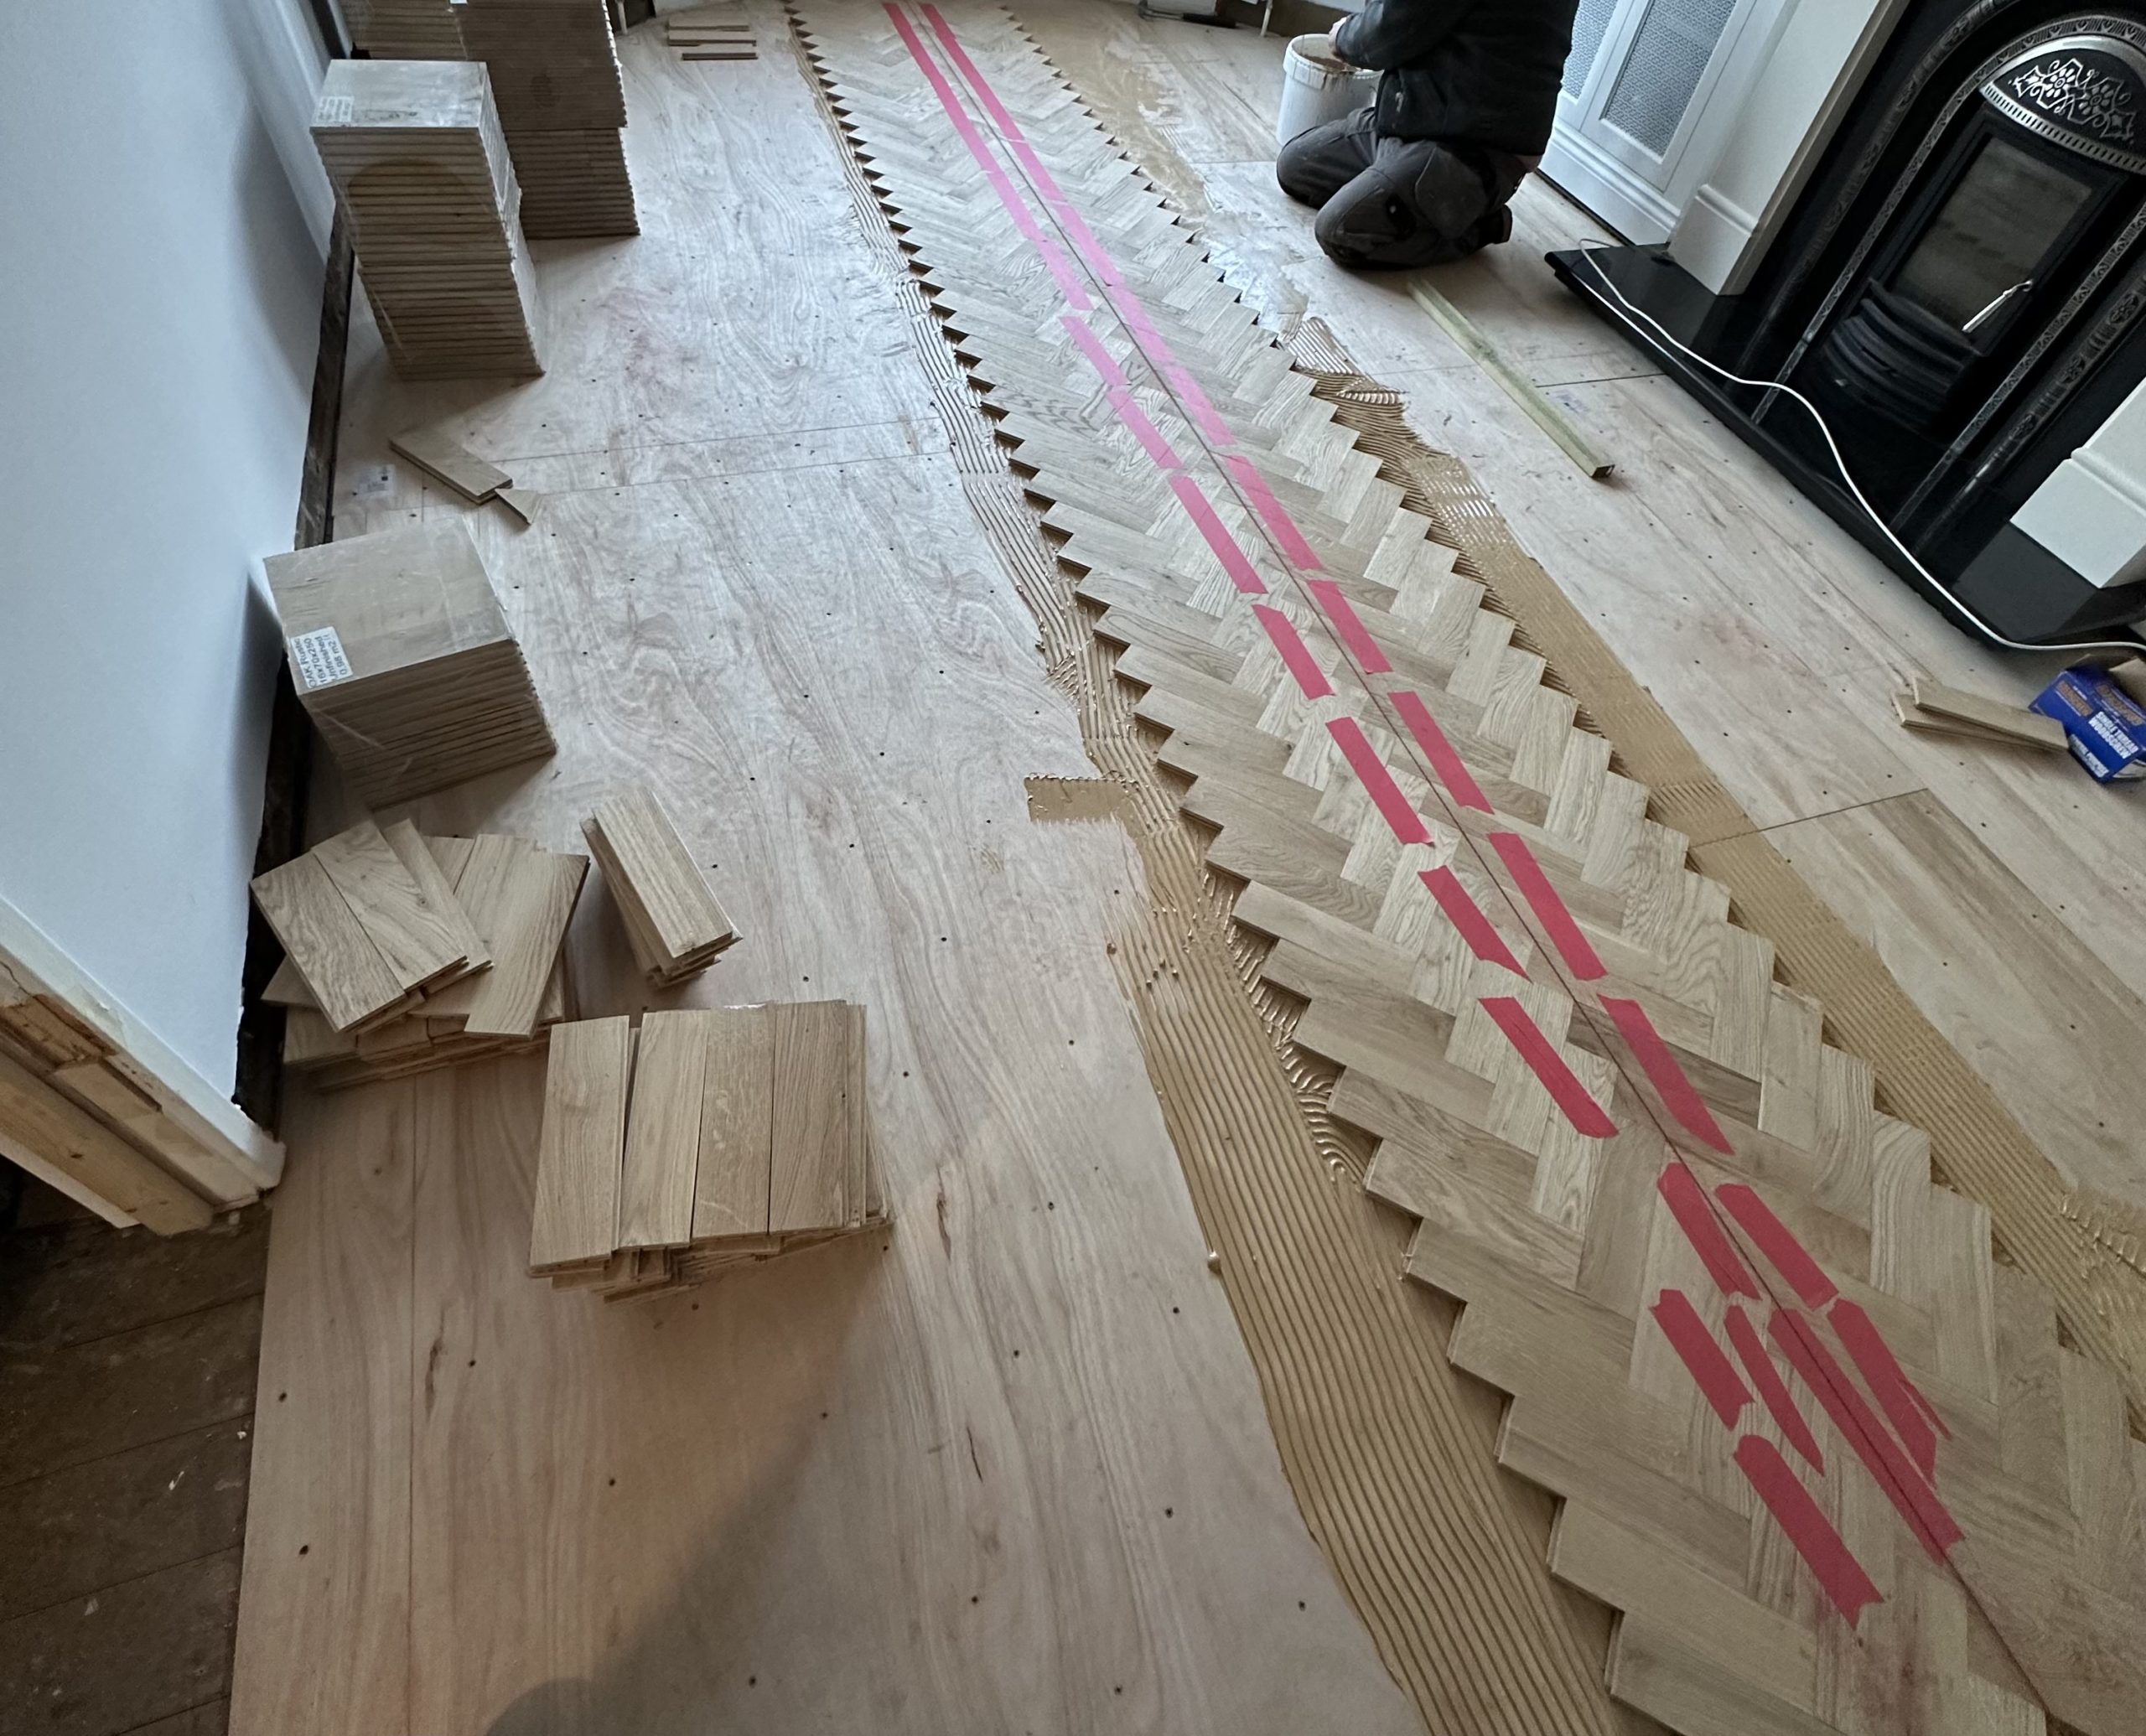
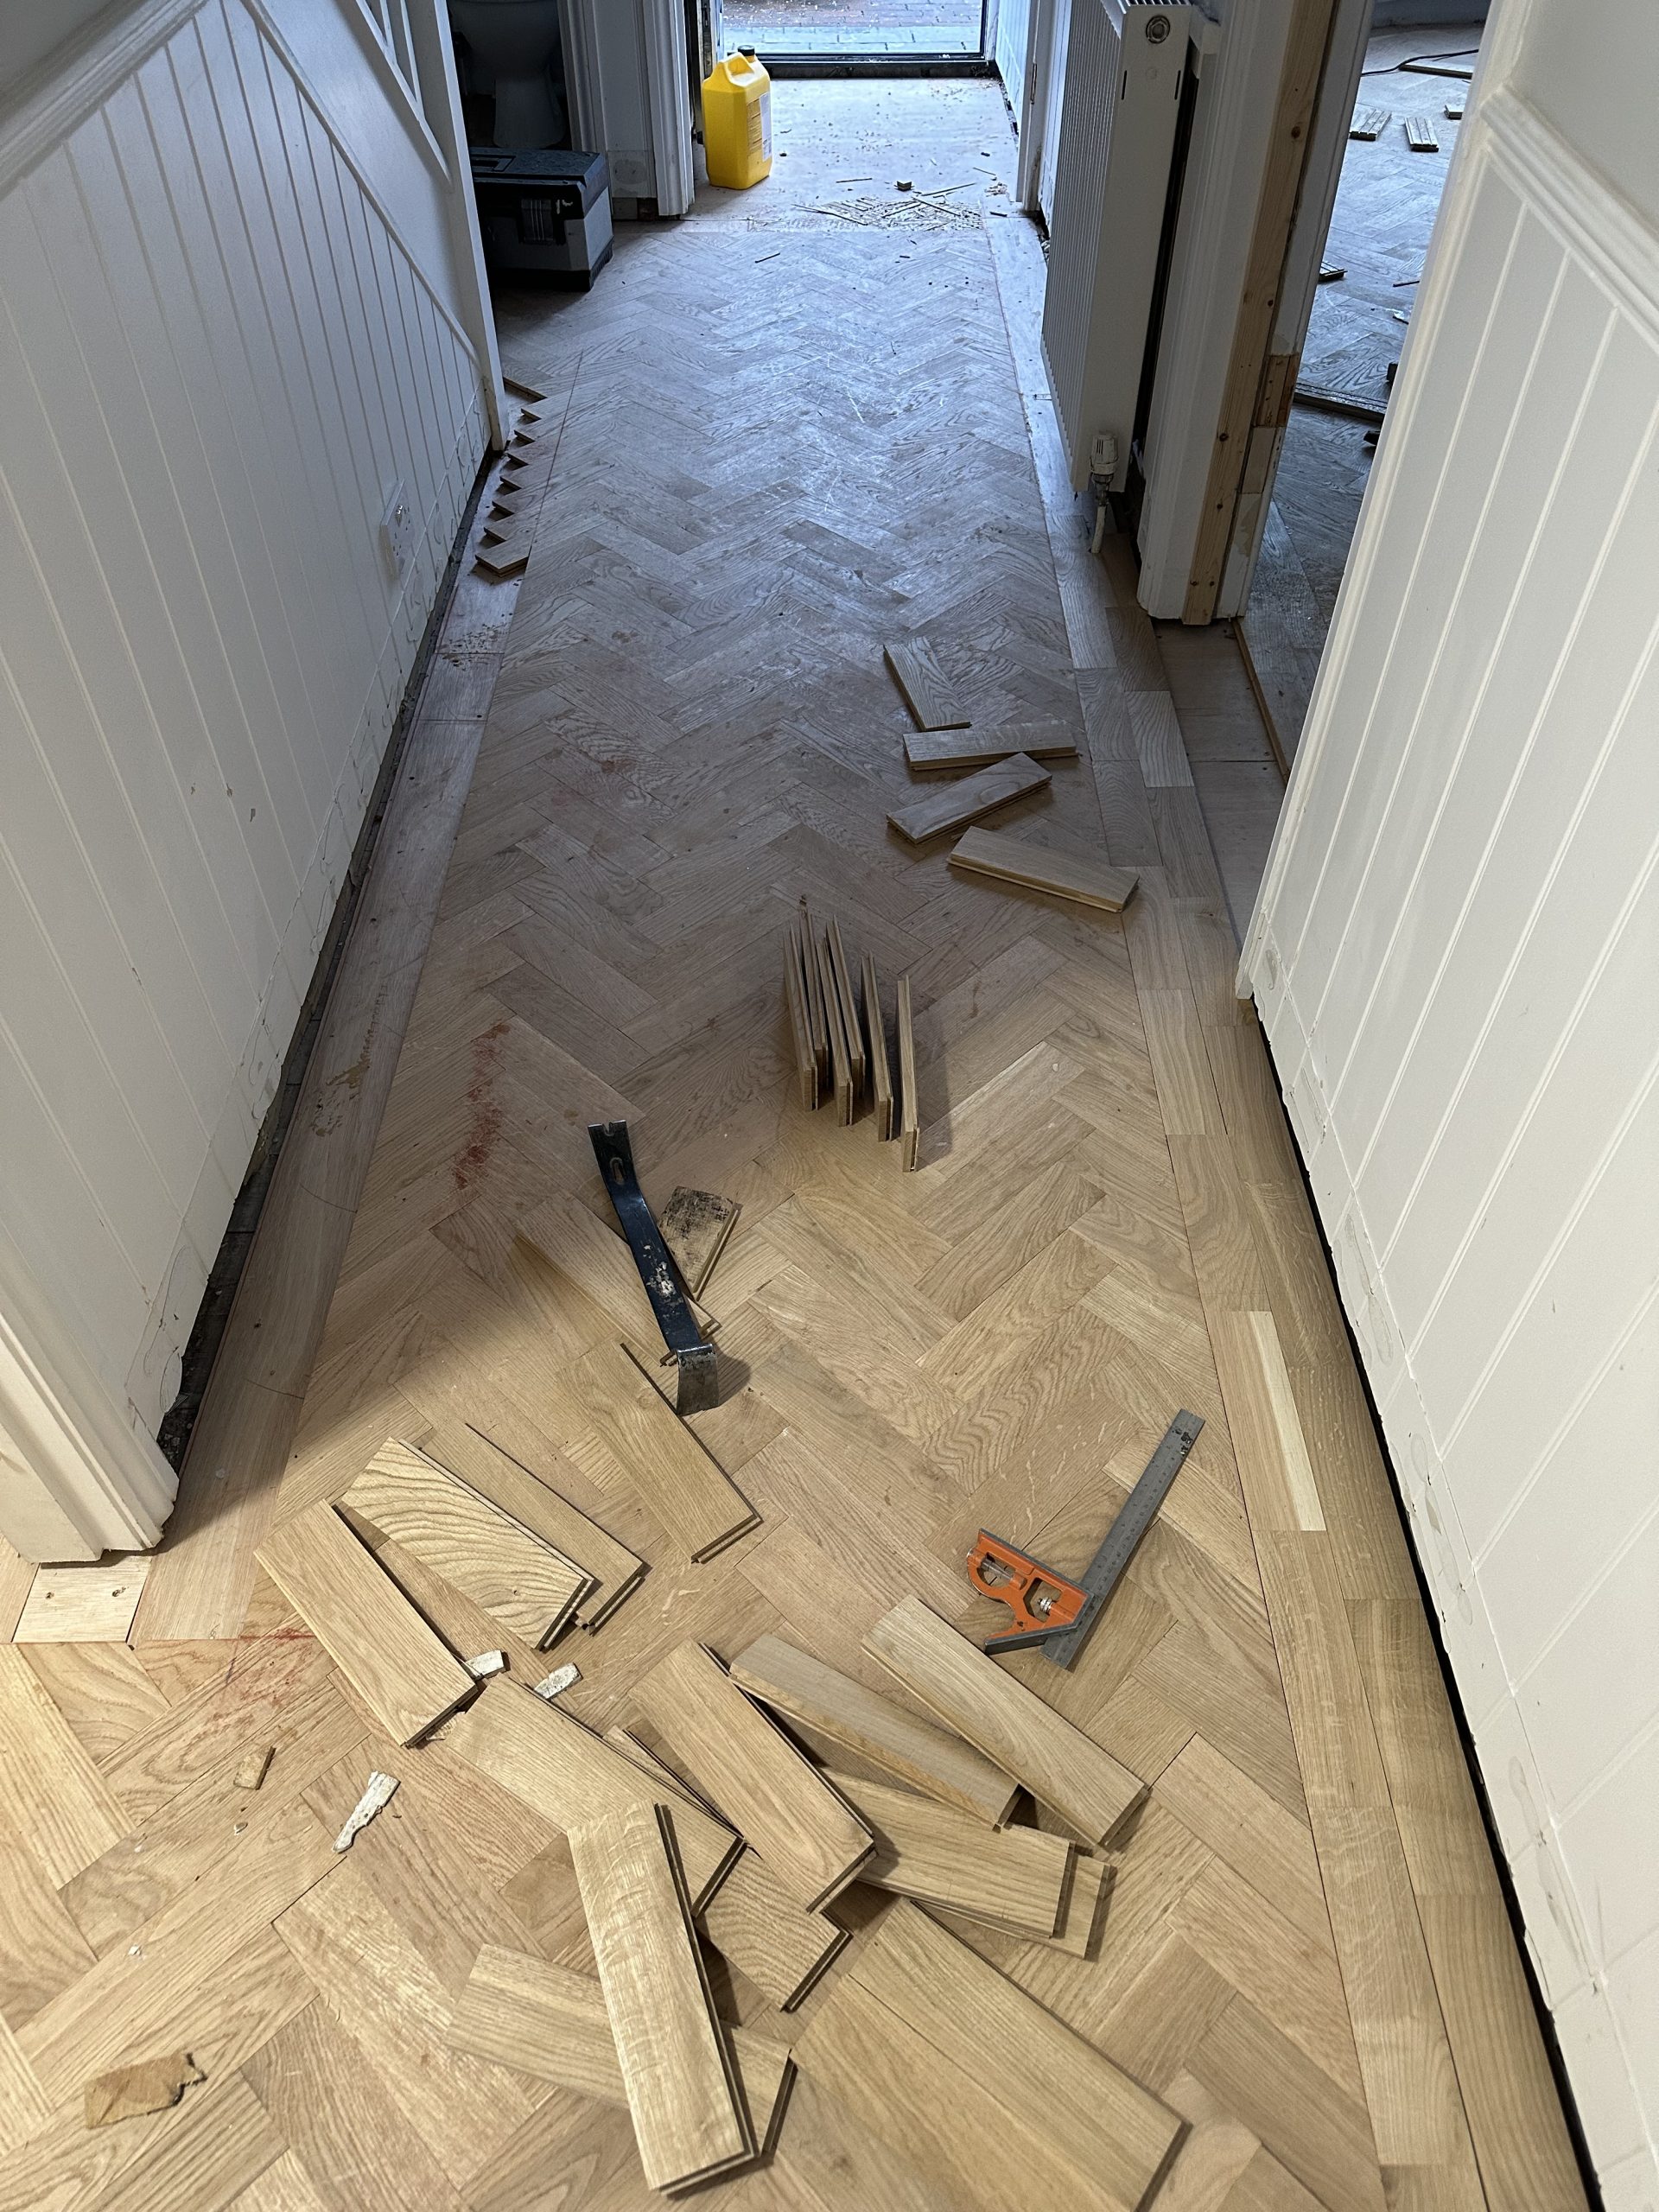
For herringbone flooring, the crown is the first section to be installed and forms the fixed reference from which the rest of the field is built. It runs the full length of the area and has to follow the working lines accurately, because any deviation introduced here will continue through the floor as subsequent rows are added.
The crown can be formed from two or more rows depending on the installation. On this floor we used a four-block crown, giving us greater control over the alignment of the blocks and the joints through the run. That additional width allows small adjustments to be made while the crown is being established, helping to keep it straight and preventing minor discrepancies from developing into increasingly visible gaps as the field grows away from it.
Once the crown has been laid, checked against the working lines and allowed to set overnight, the remainder of the field is installed outwards from it. At that point the crown becomes the stable reference for the pattern on both sides.
Filling the Field
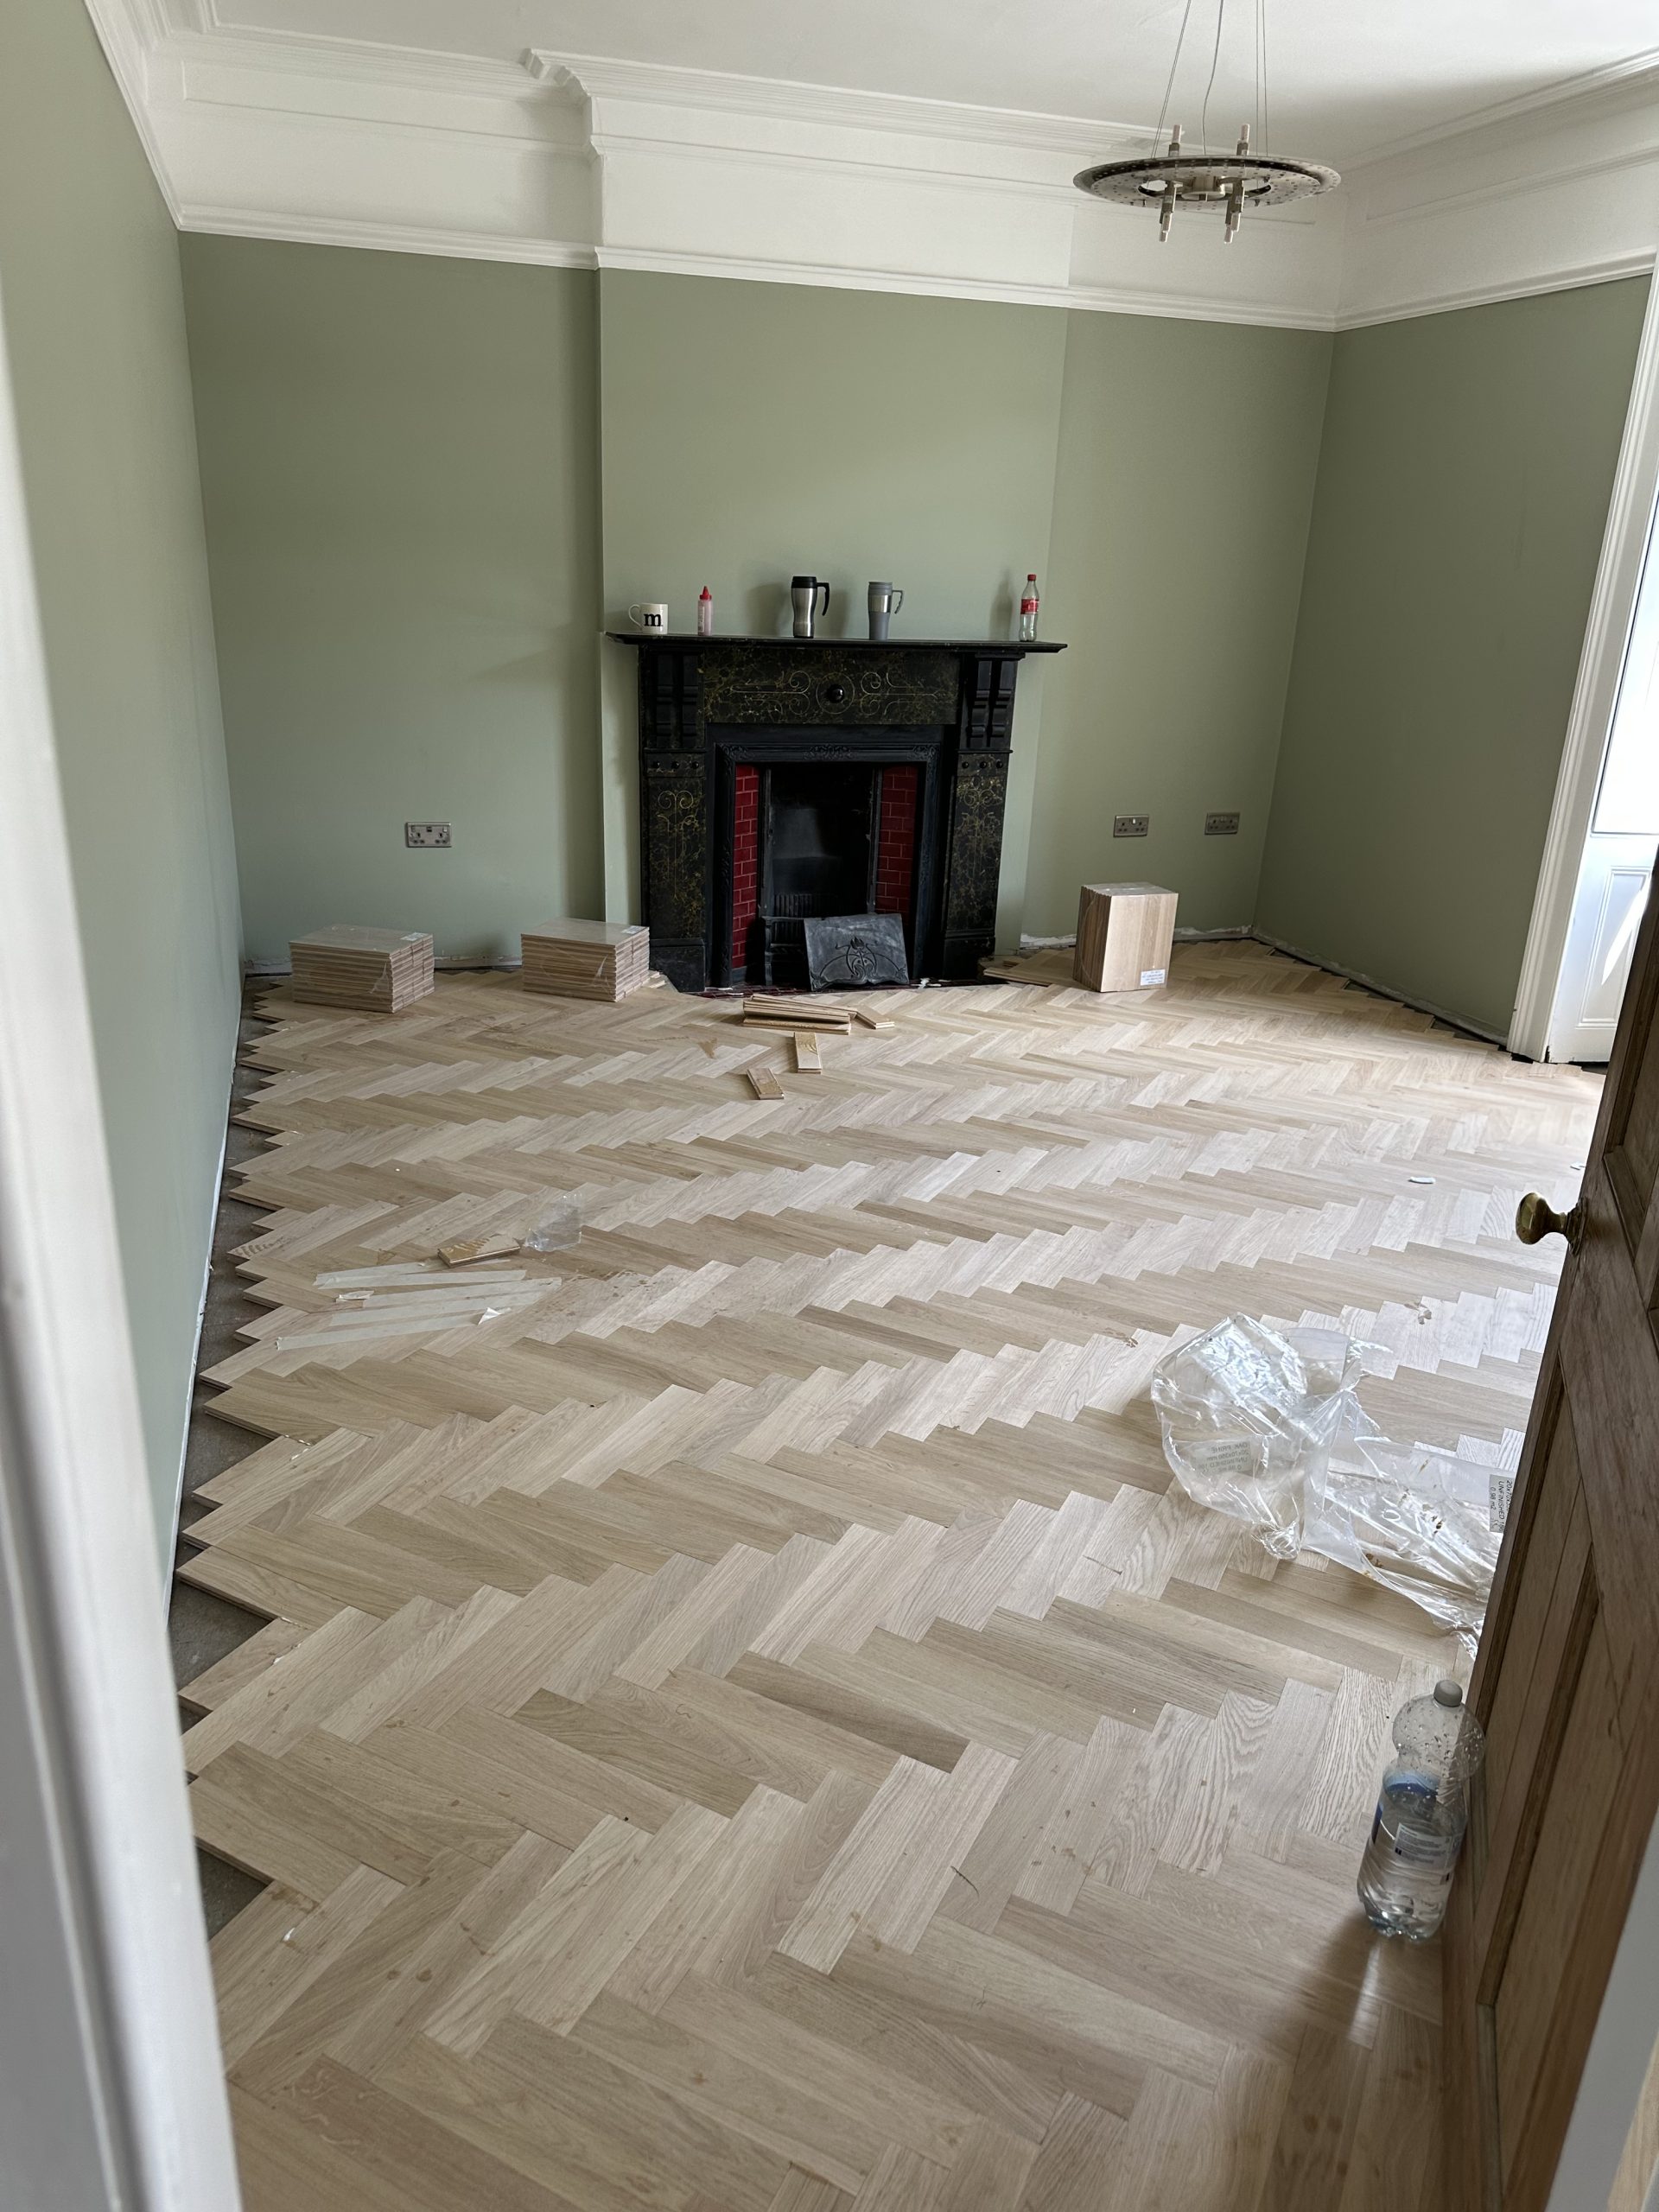
Once the crown has been allowed to set, the main field can be installed outwards from it. The fixed crown provides the reference for the blocks on both sides, while the working lines established during setting out continue to be checked as the pattern progresses across the room.
The field is built progressively rather than being allowed to follow the surrounding walls. This preserves the original setting-out geometry and keeps the herringbone running consistently through the space, even where the walls themselves are not perfectly straight or square.
At this stage the flooring is carried beyond the lines of the planned border. The completed field is cut back afterwards to create an accurate edge for the border, rather than attempting to fit each individual herringbone block to the perimeter as the field is being laid.

Cutting the Field for the Border
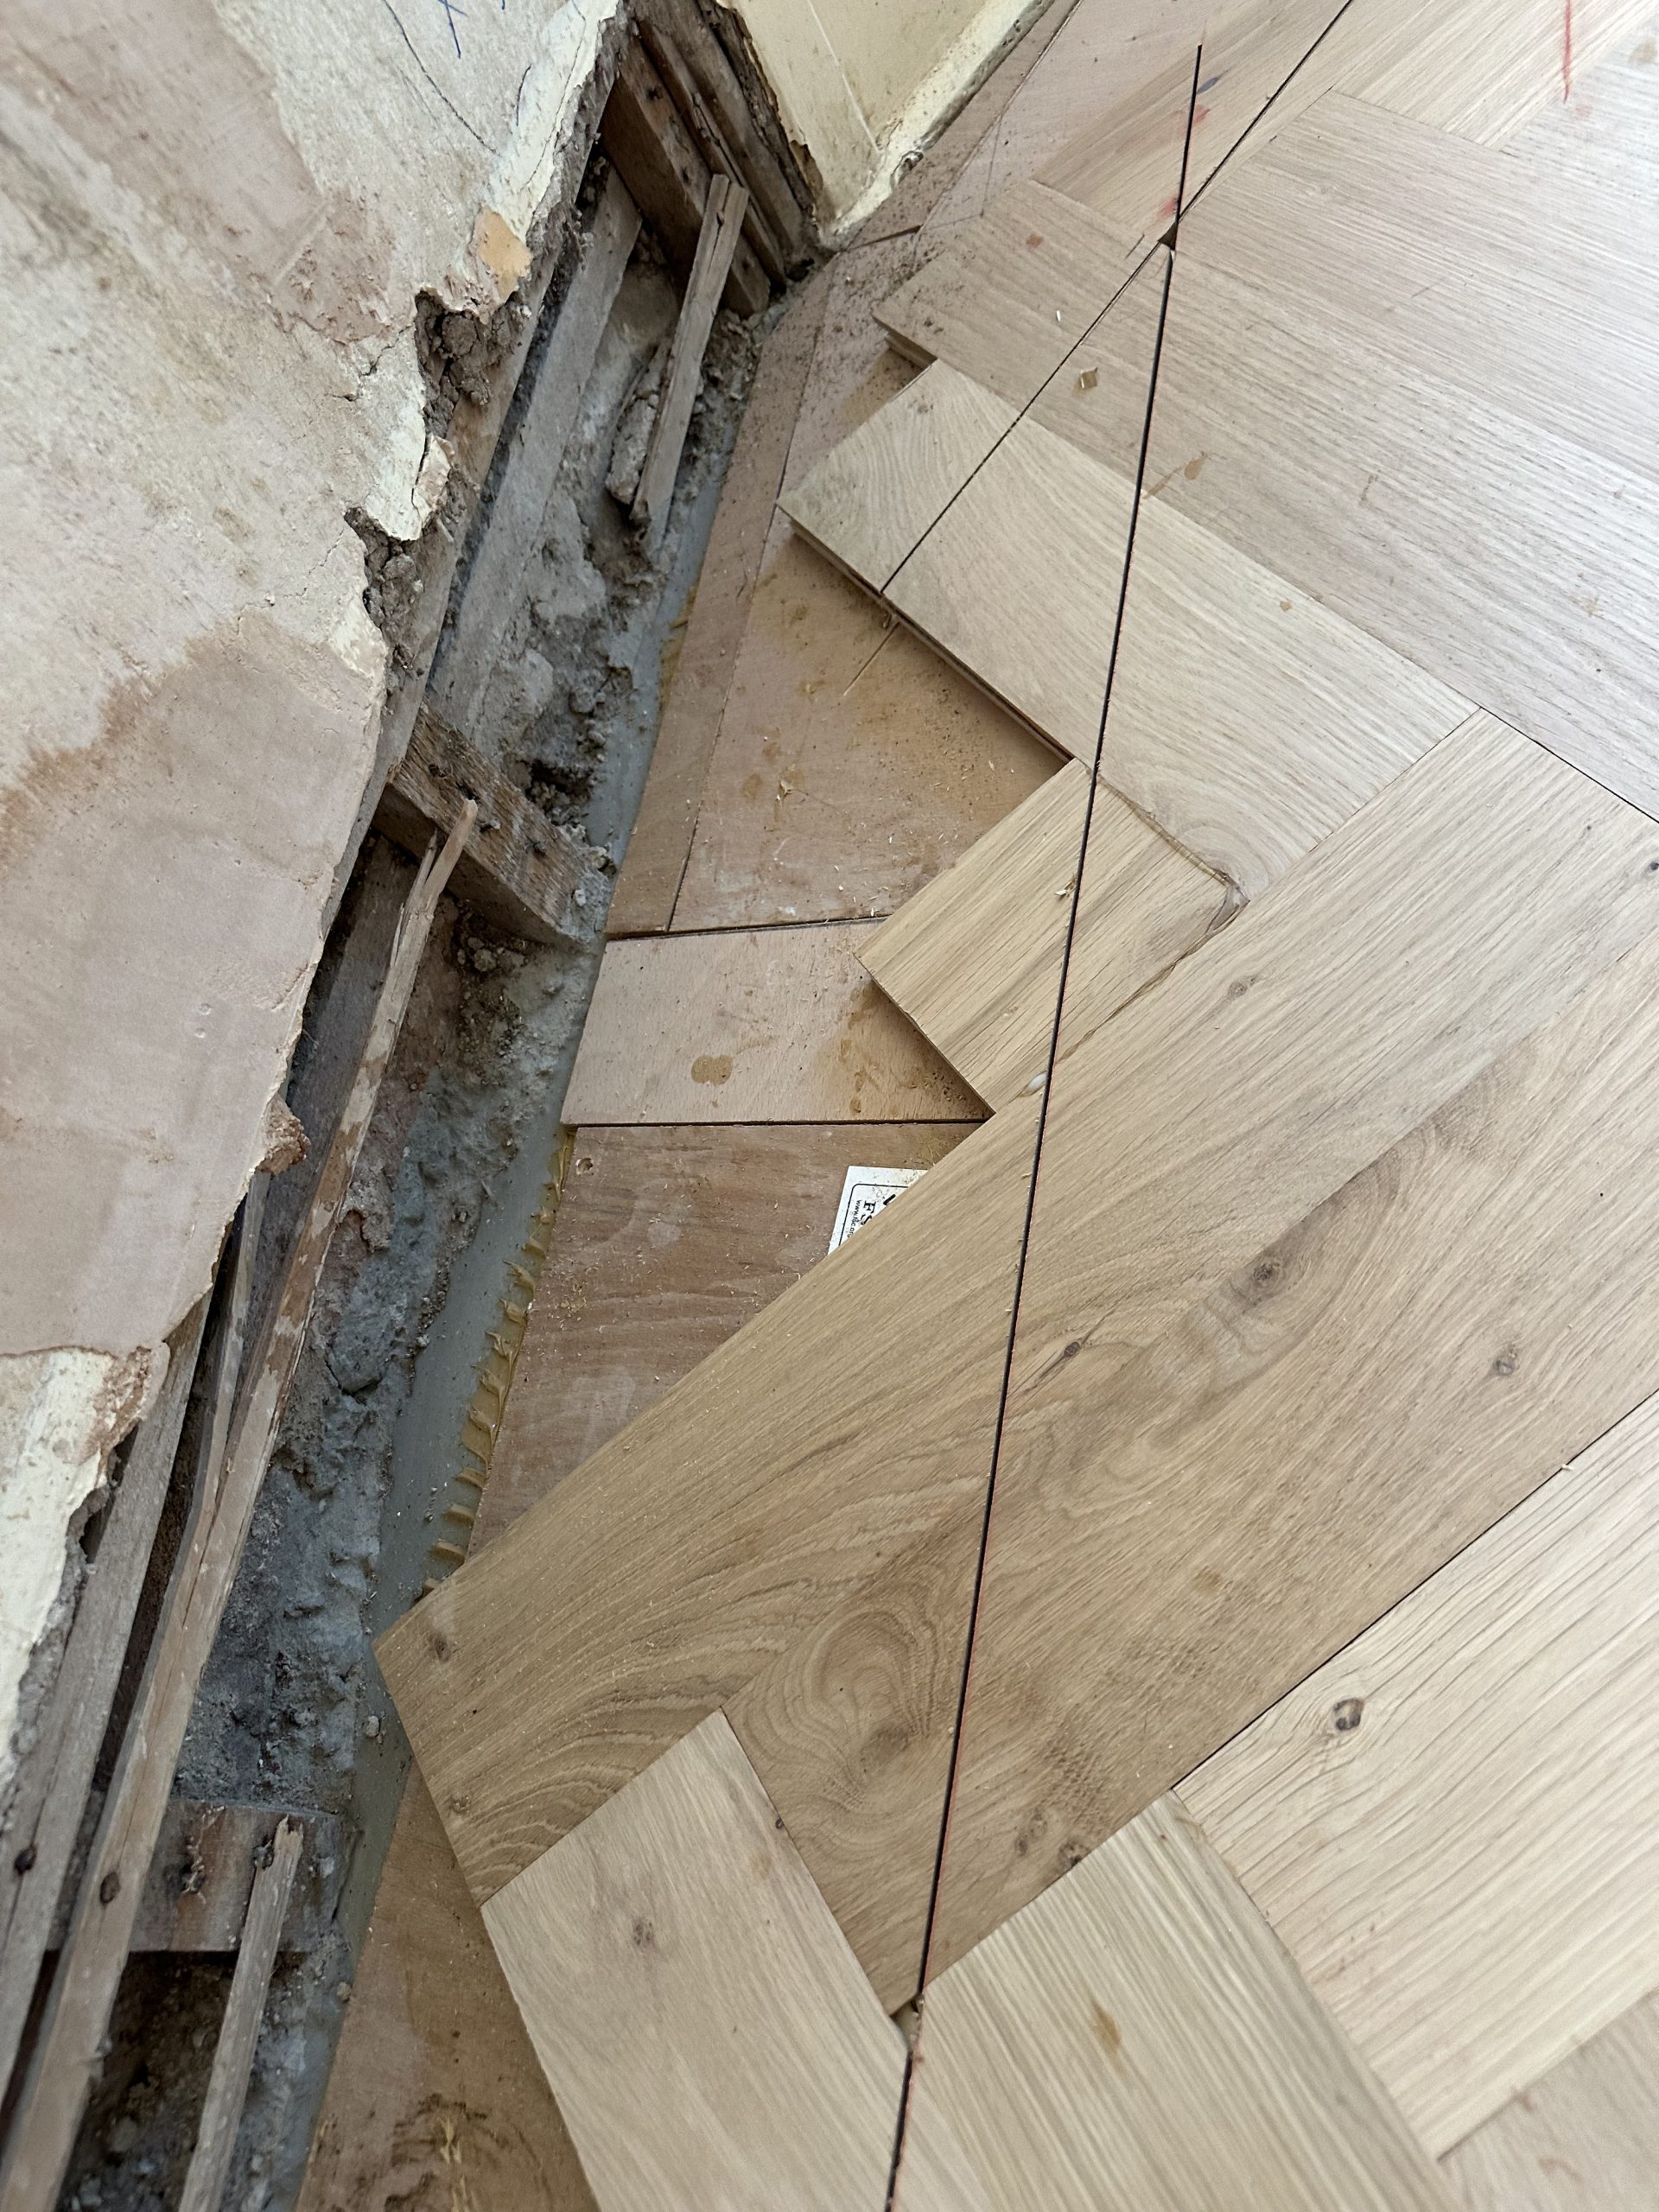
Once the herringbone field has been completed, the border positions established during the original setting out are transferred back onto the installed floor. This returns us to the geometry fixed before any blocks were laid, rather than taking new measurements from walls that may not be straight or square.
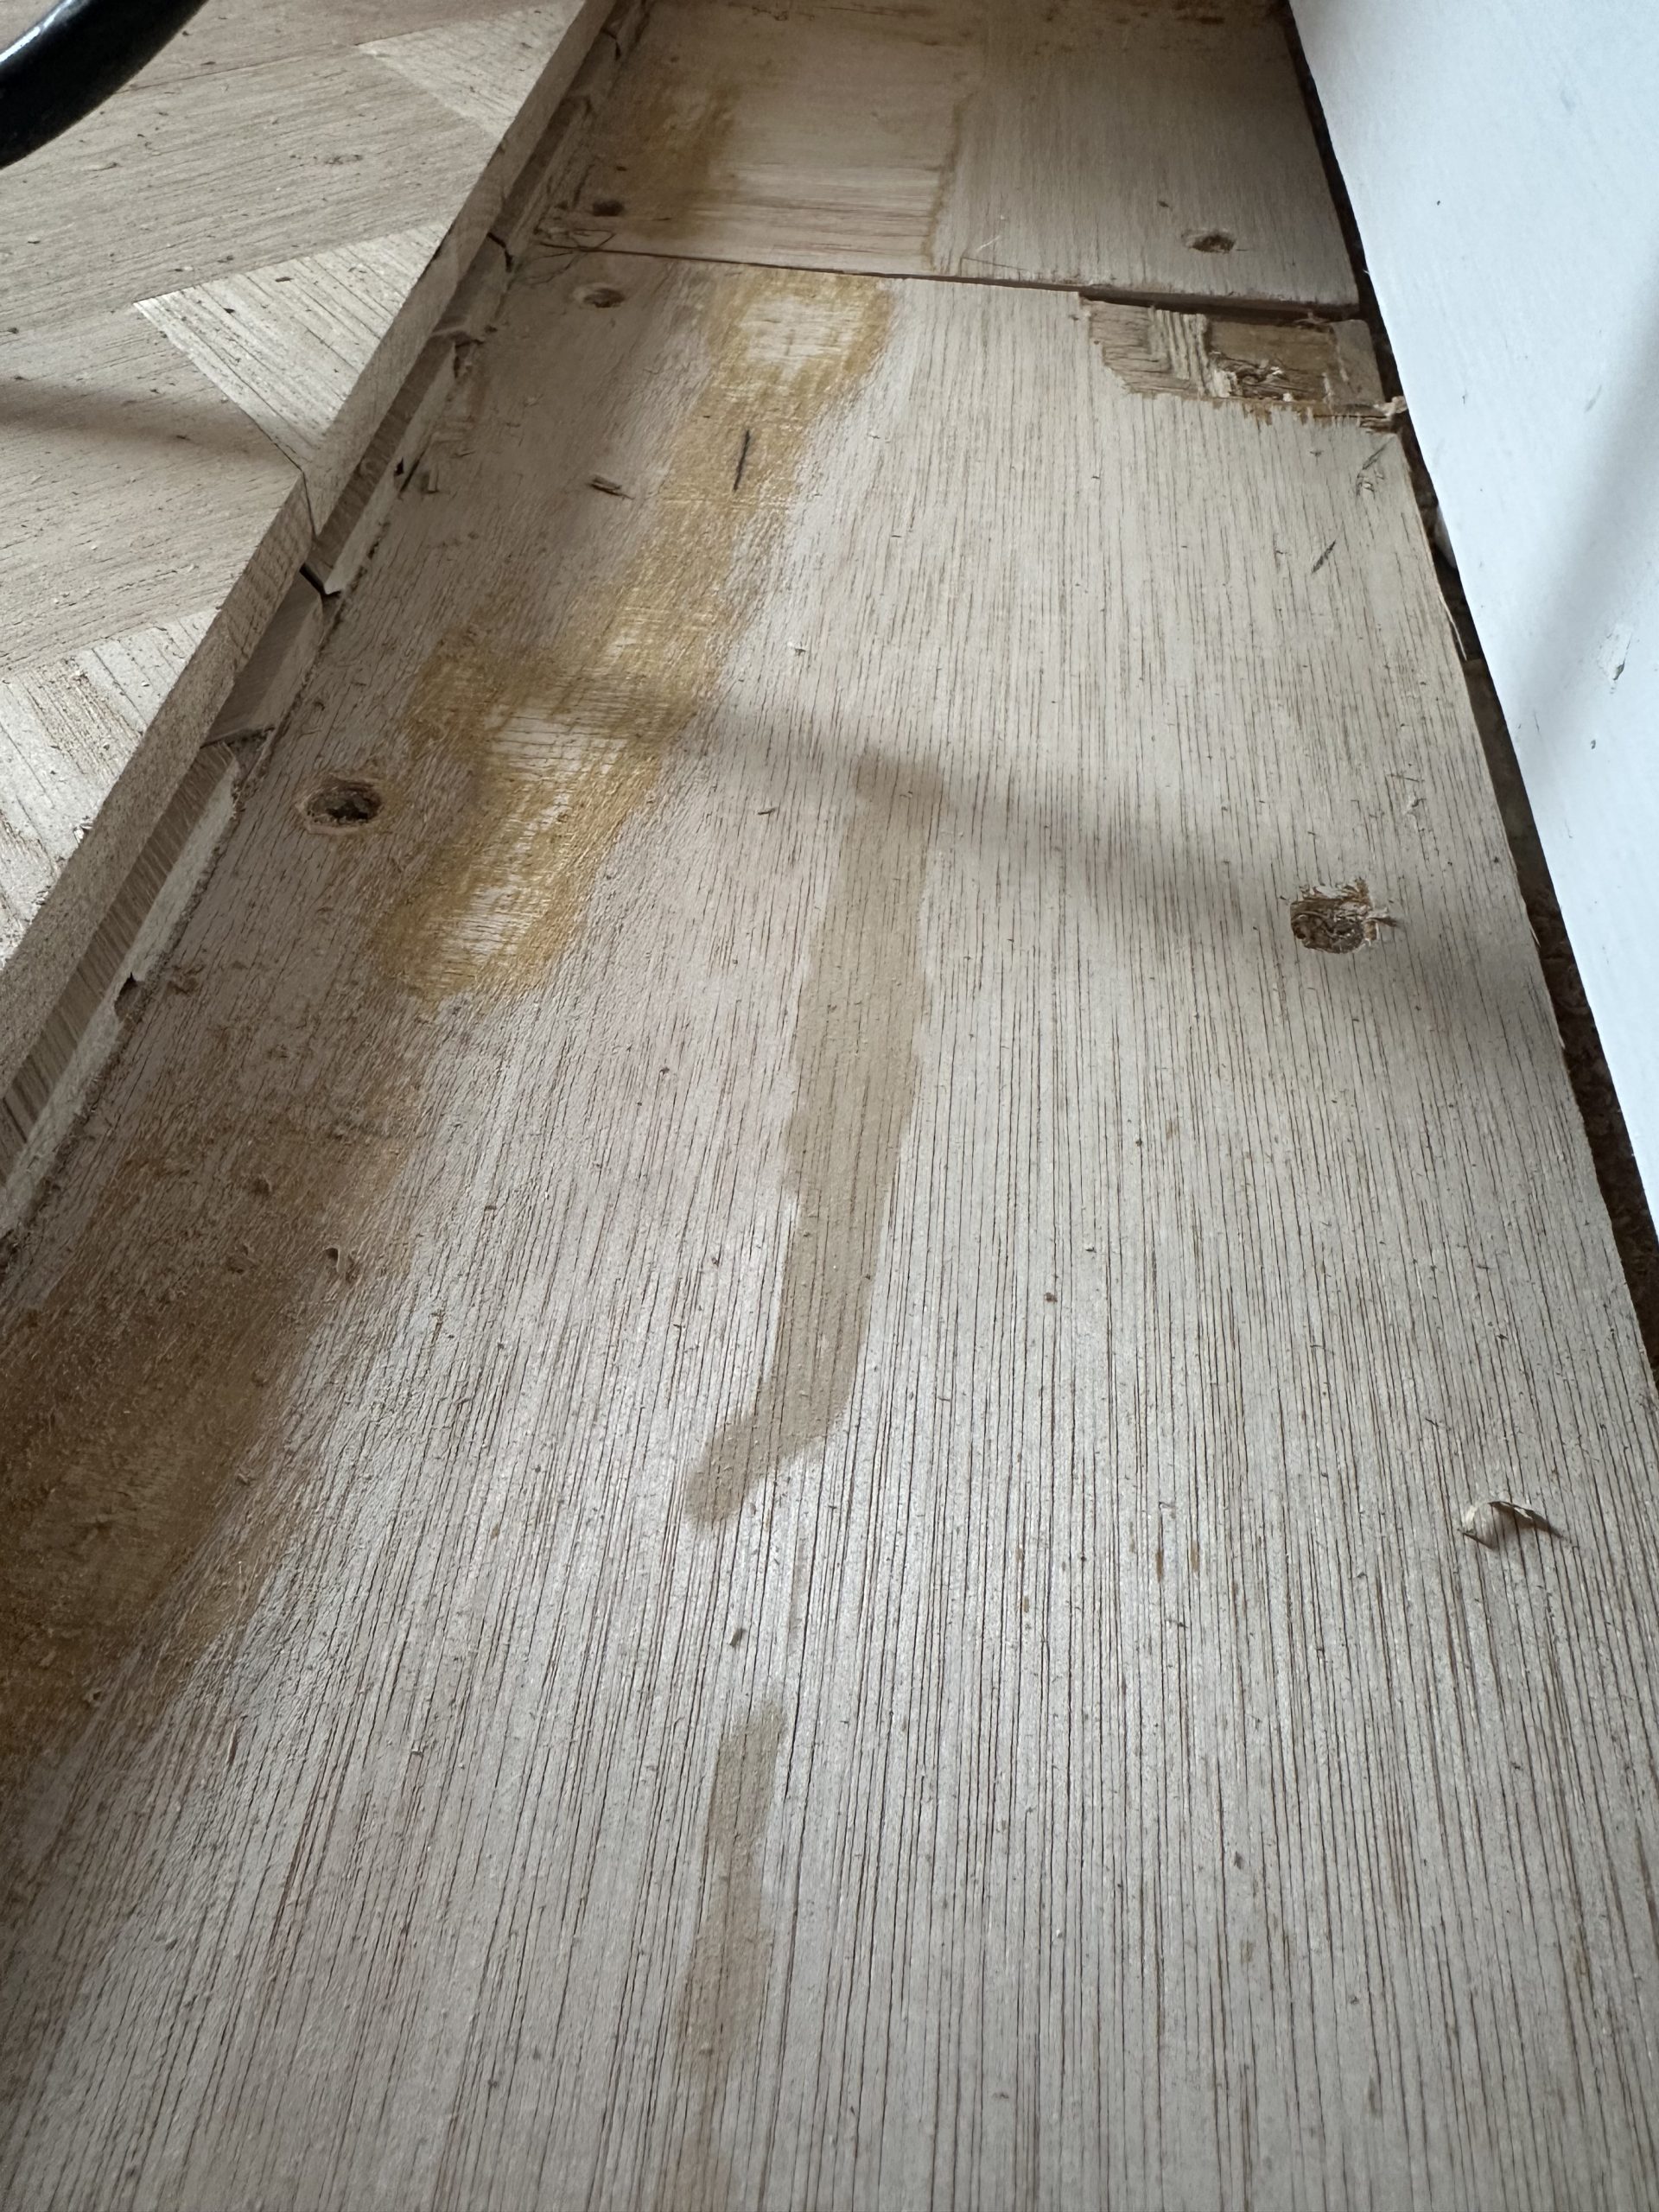
The field is then cut accurately along those lines using a track saw to create the opening for the border. This is why the herringbone is initially allowed to run beyond its finished position: the edge is formed afterwards as one continuous, controlled cut rather than by individually fitting the ends of the field to the surrounding walls.
Once the field has been cut back, a groove is routed into the newly formed edge. The tongue of the border blocks can then engage with the field as the border is installed, creating a positive mechanical connection between the two sections as well as the adhesive bond beneath them.
Setting and Fitting the Border
Once the field has been cut back and the groove prepared, the border itself is set out before it is fixed. We do not simply begin at one corner and accept whatever size piece is left when the run reaches the next.
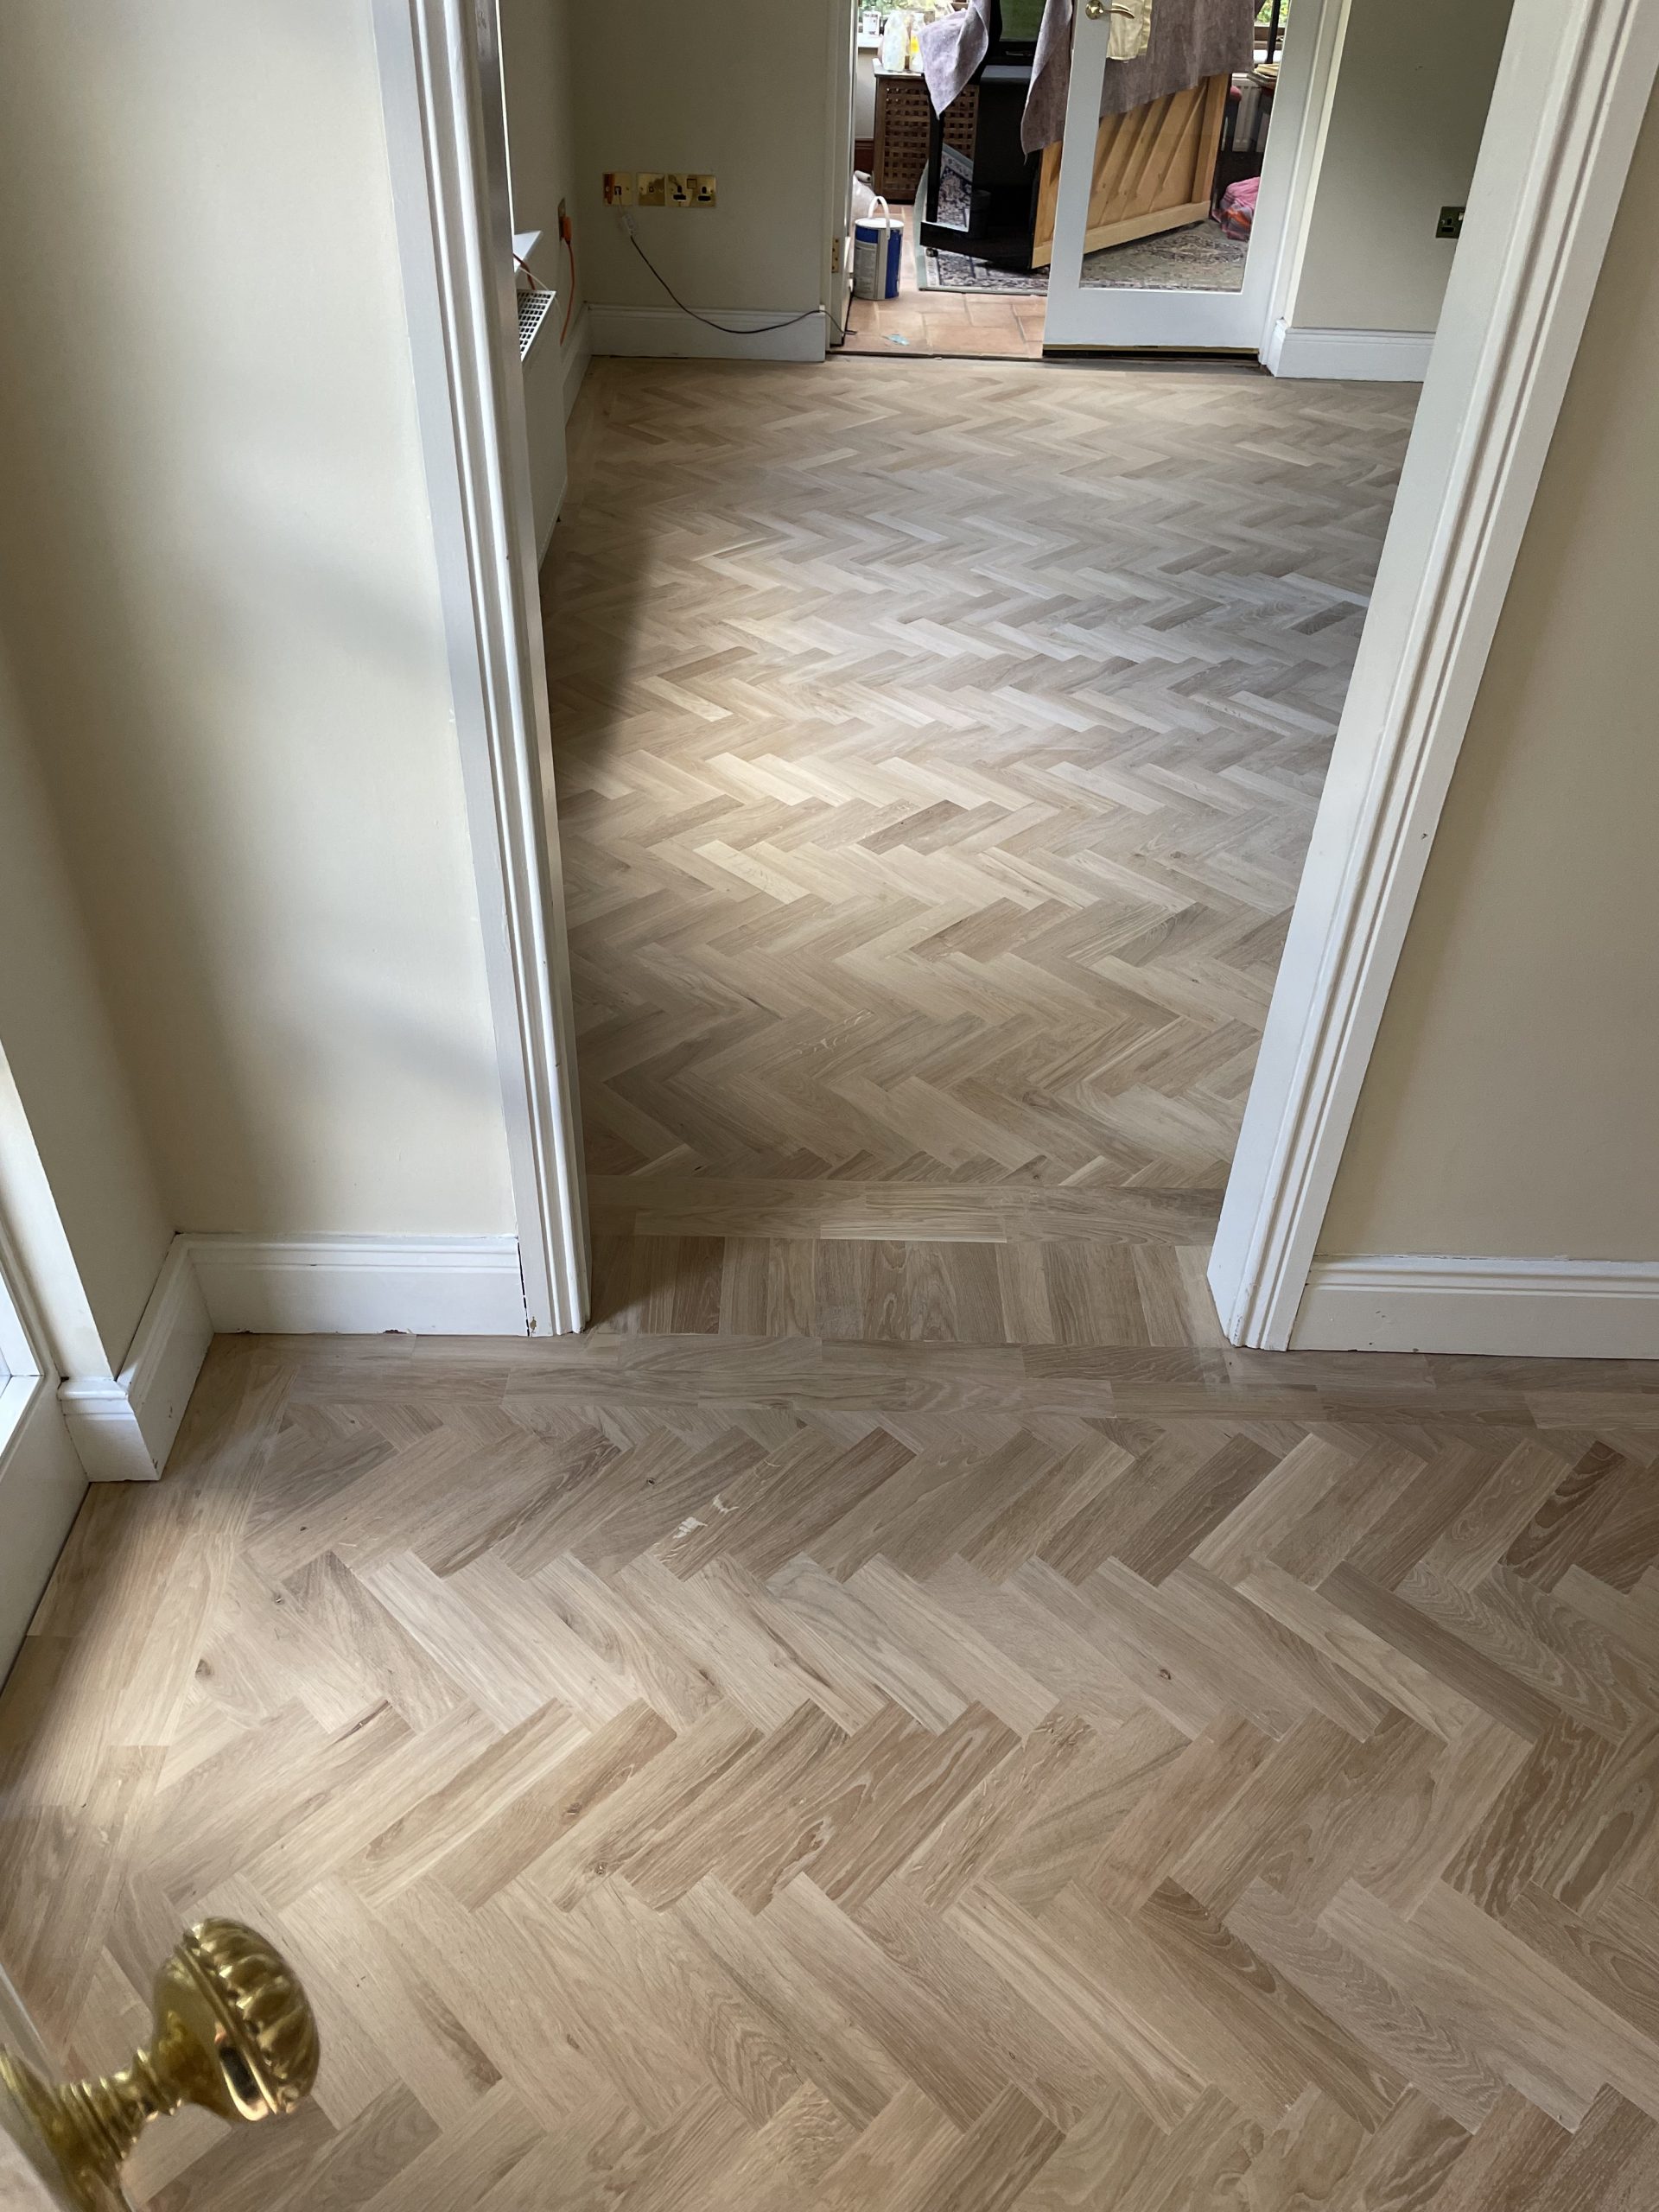
Each run is dry-fitted from corner to corner first. The number of blocks and the available distance are checked together, and small adjustments are distributed through the run so that the blocks remain visually consistent. The aim is that, to the eye, they read as full blocks rather than finishing with an obviously shortened piece at one end.
This is worked out independently along each wall. On a two-block border the corner positions also need to resolve correctly so that the two rows meet cleanly through the mitres. Only once the complete run has been checked and the proportions are right is the border fixed into position, with its tongue engaging into the groove routed into the field.
The same approach continues through doorways, around projections and wherever the border changes direction. The dimensions may need to be adjusted slightly to suit the building, but those adjustments are absorbed through the run rather than being left as one conspicuous cut at the end.
Sanding and Finishing on Site
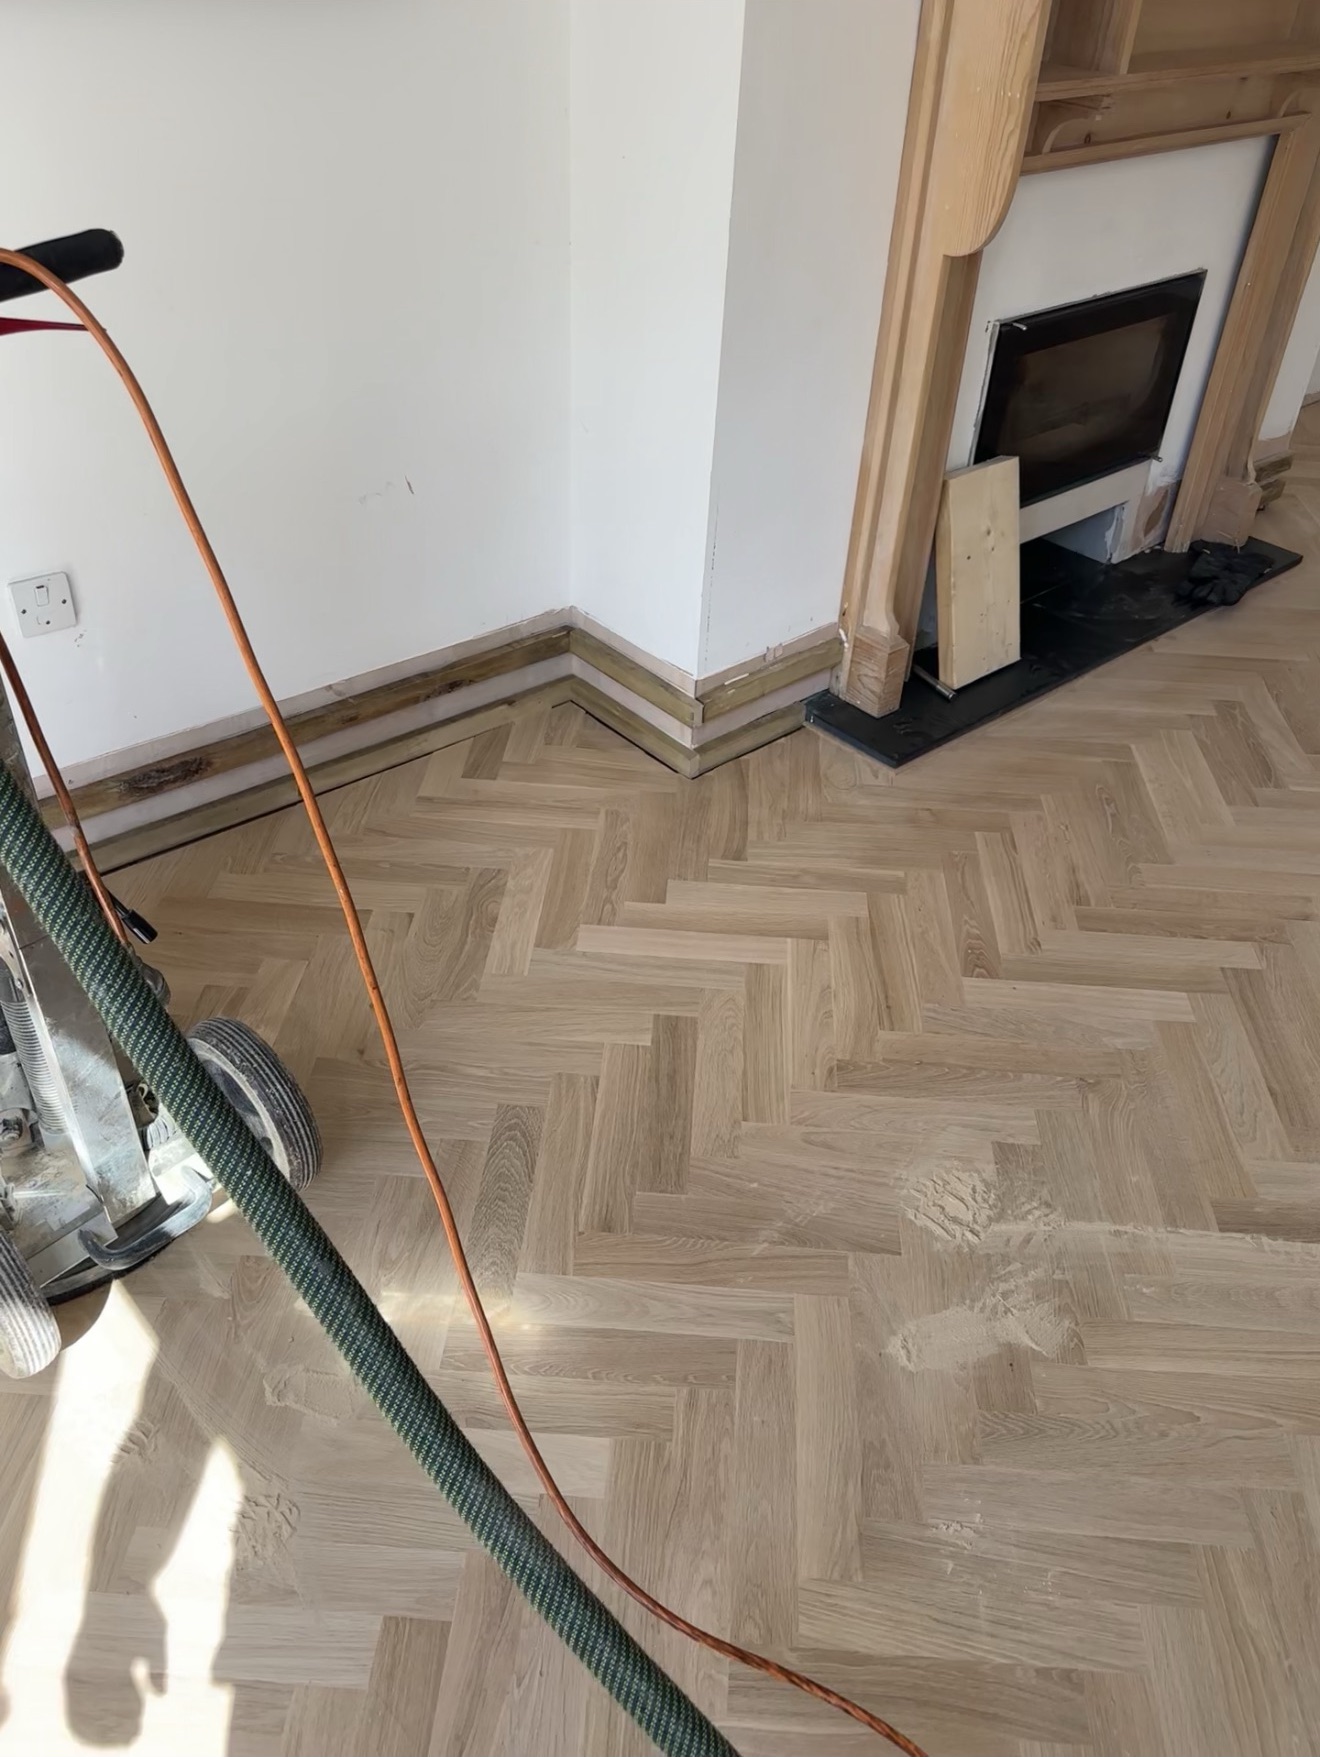
Where flooring is supplied unfinished, the installation does not end when the timber has been laid. Whether the floor is plank, herringbone or another parquet pattern, the completed installation is sanded on site before its final appearance is developed.
Sanding brings the floor together as one continuous surface, removing minor variation between individual pieces and preparing the timber for finishing. The floor is worked progressively through the sanding process, including the perimeter and detailed areas, before the final surface preparation is completed.
The timber can then be kept close to its natural appearance or coloured to suit the particular floor and interior. The protective finish is applied to the installation as a whole, so the colour, sheen and final character are developed with the completed floor in place rather than being predetermined by a factory finish.
Prefinished flooring follows a different route, as its colour and protective finish have already been applied before installation.
Completed Floors
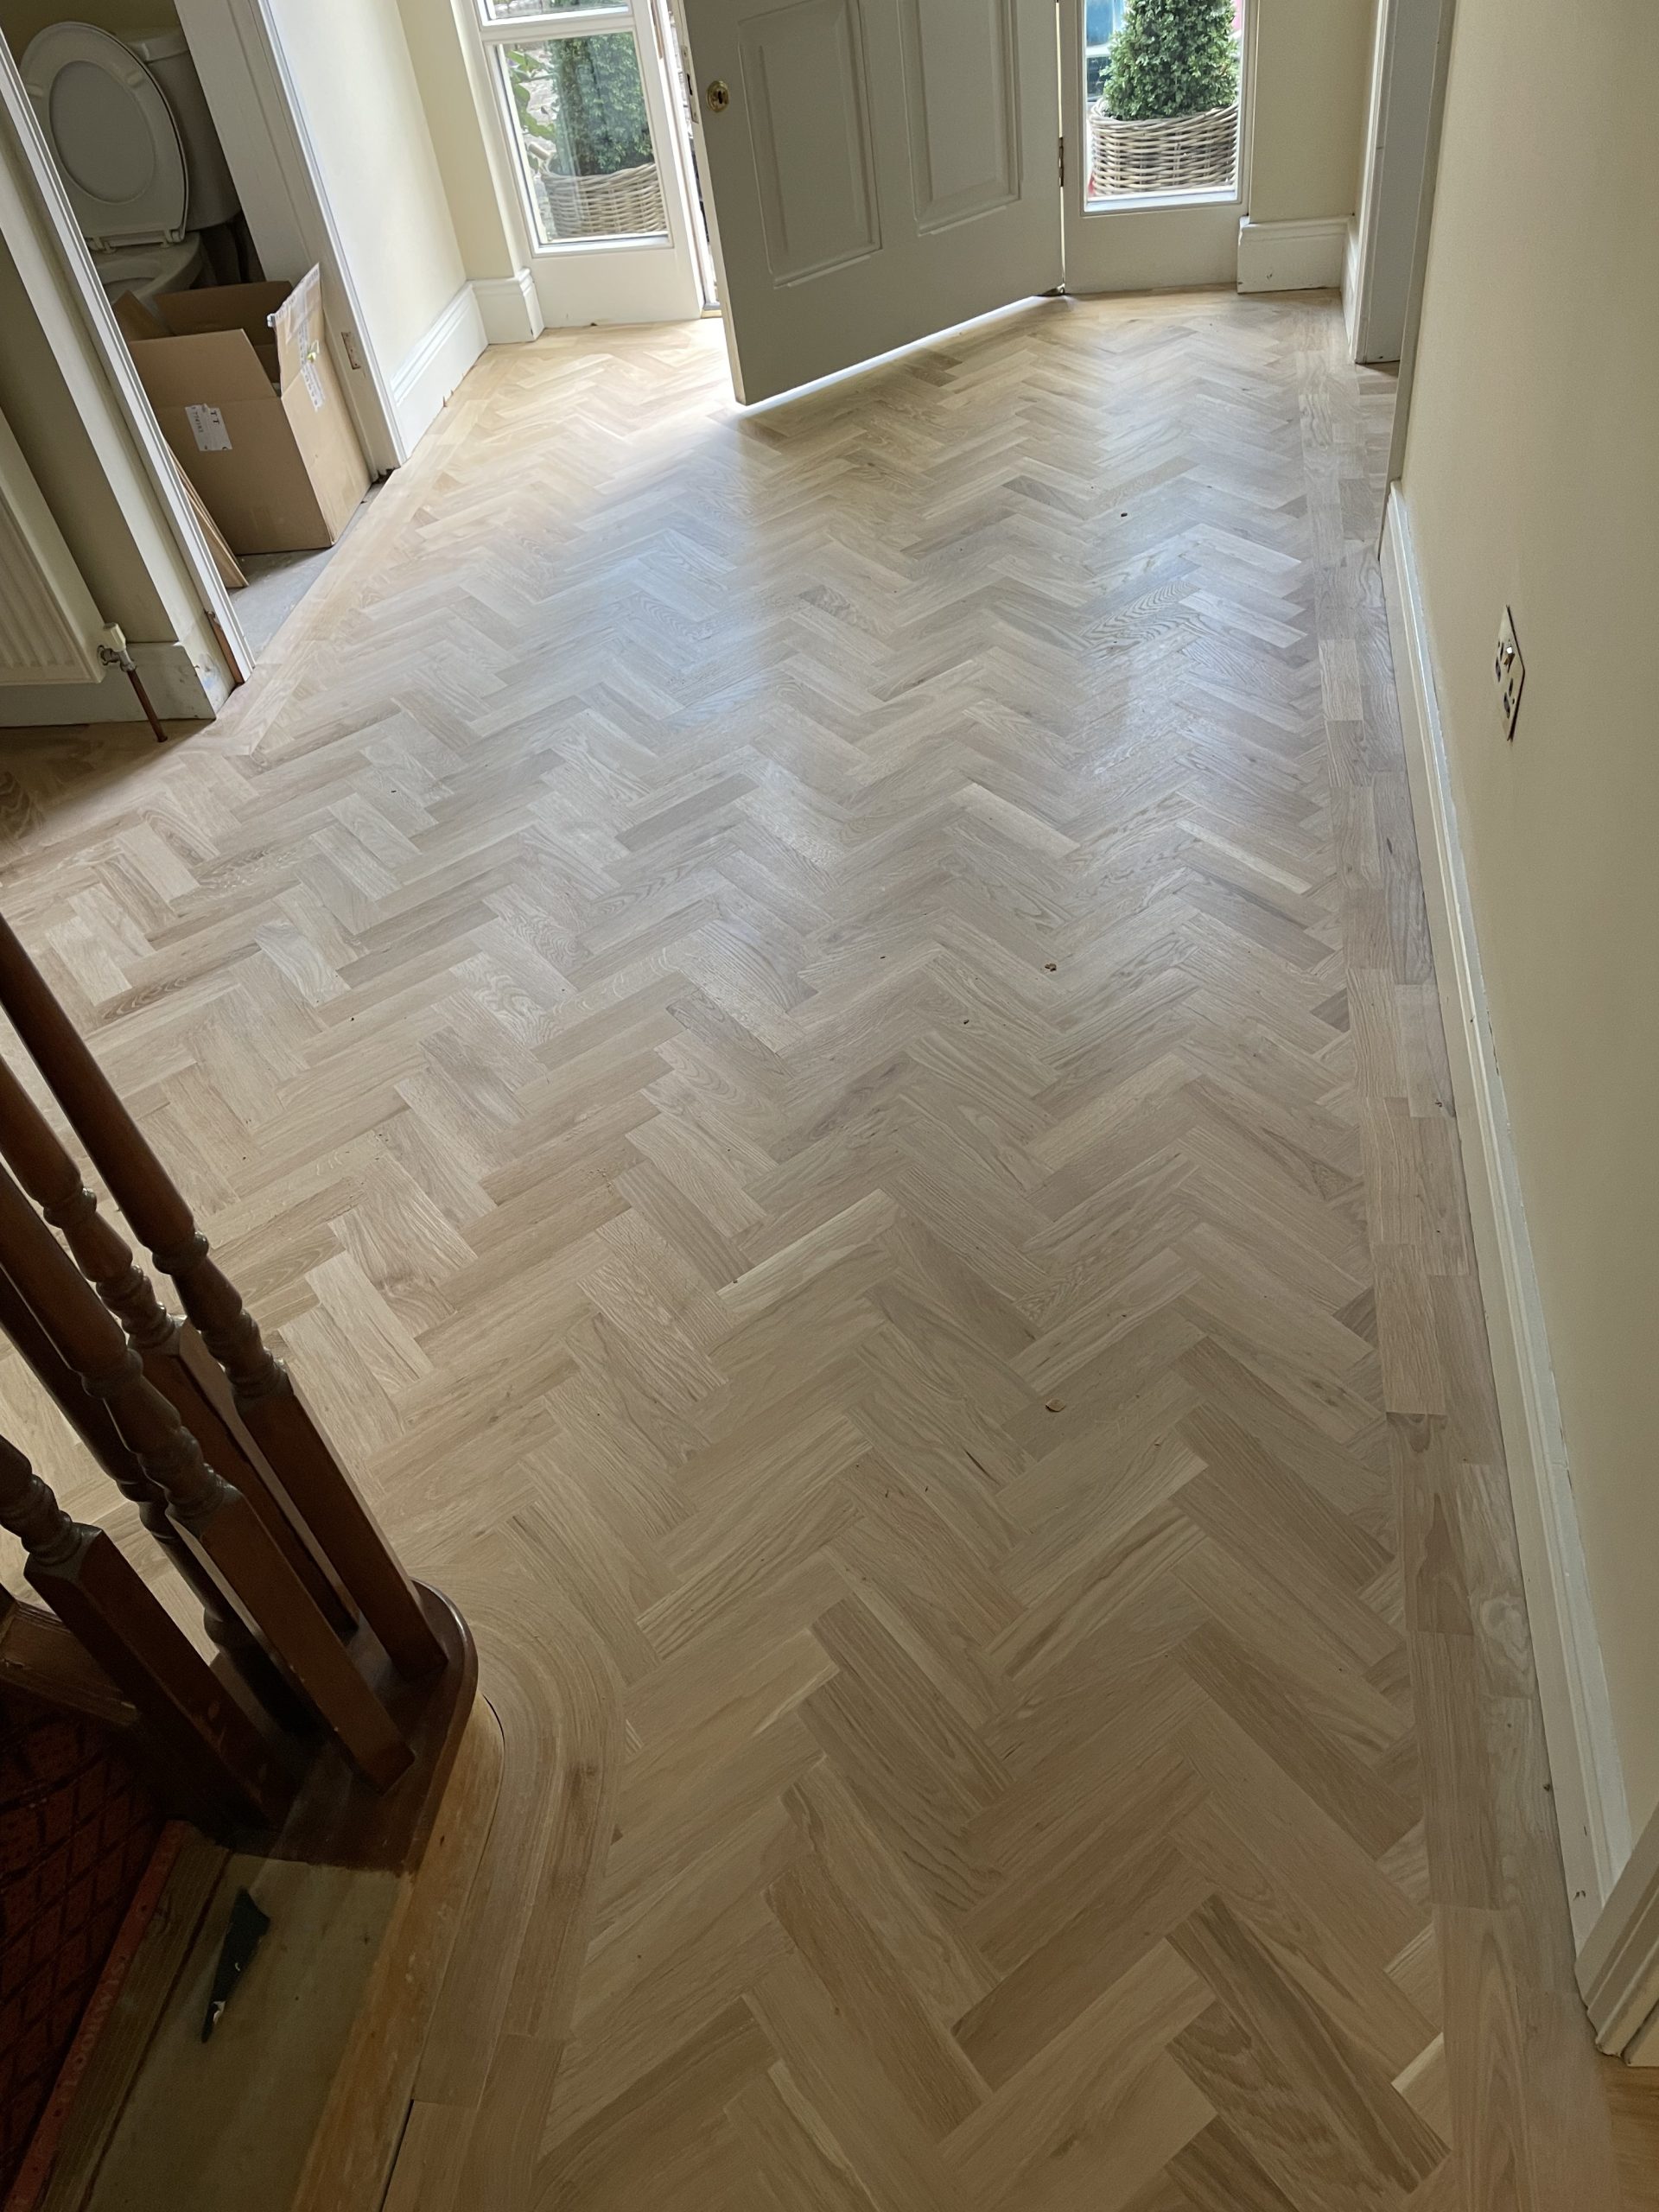
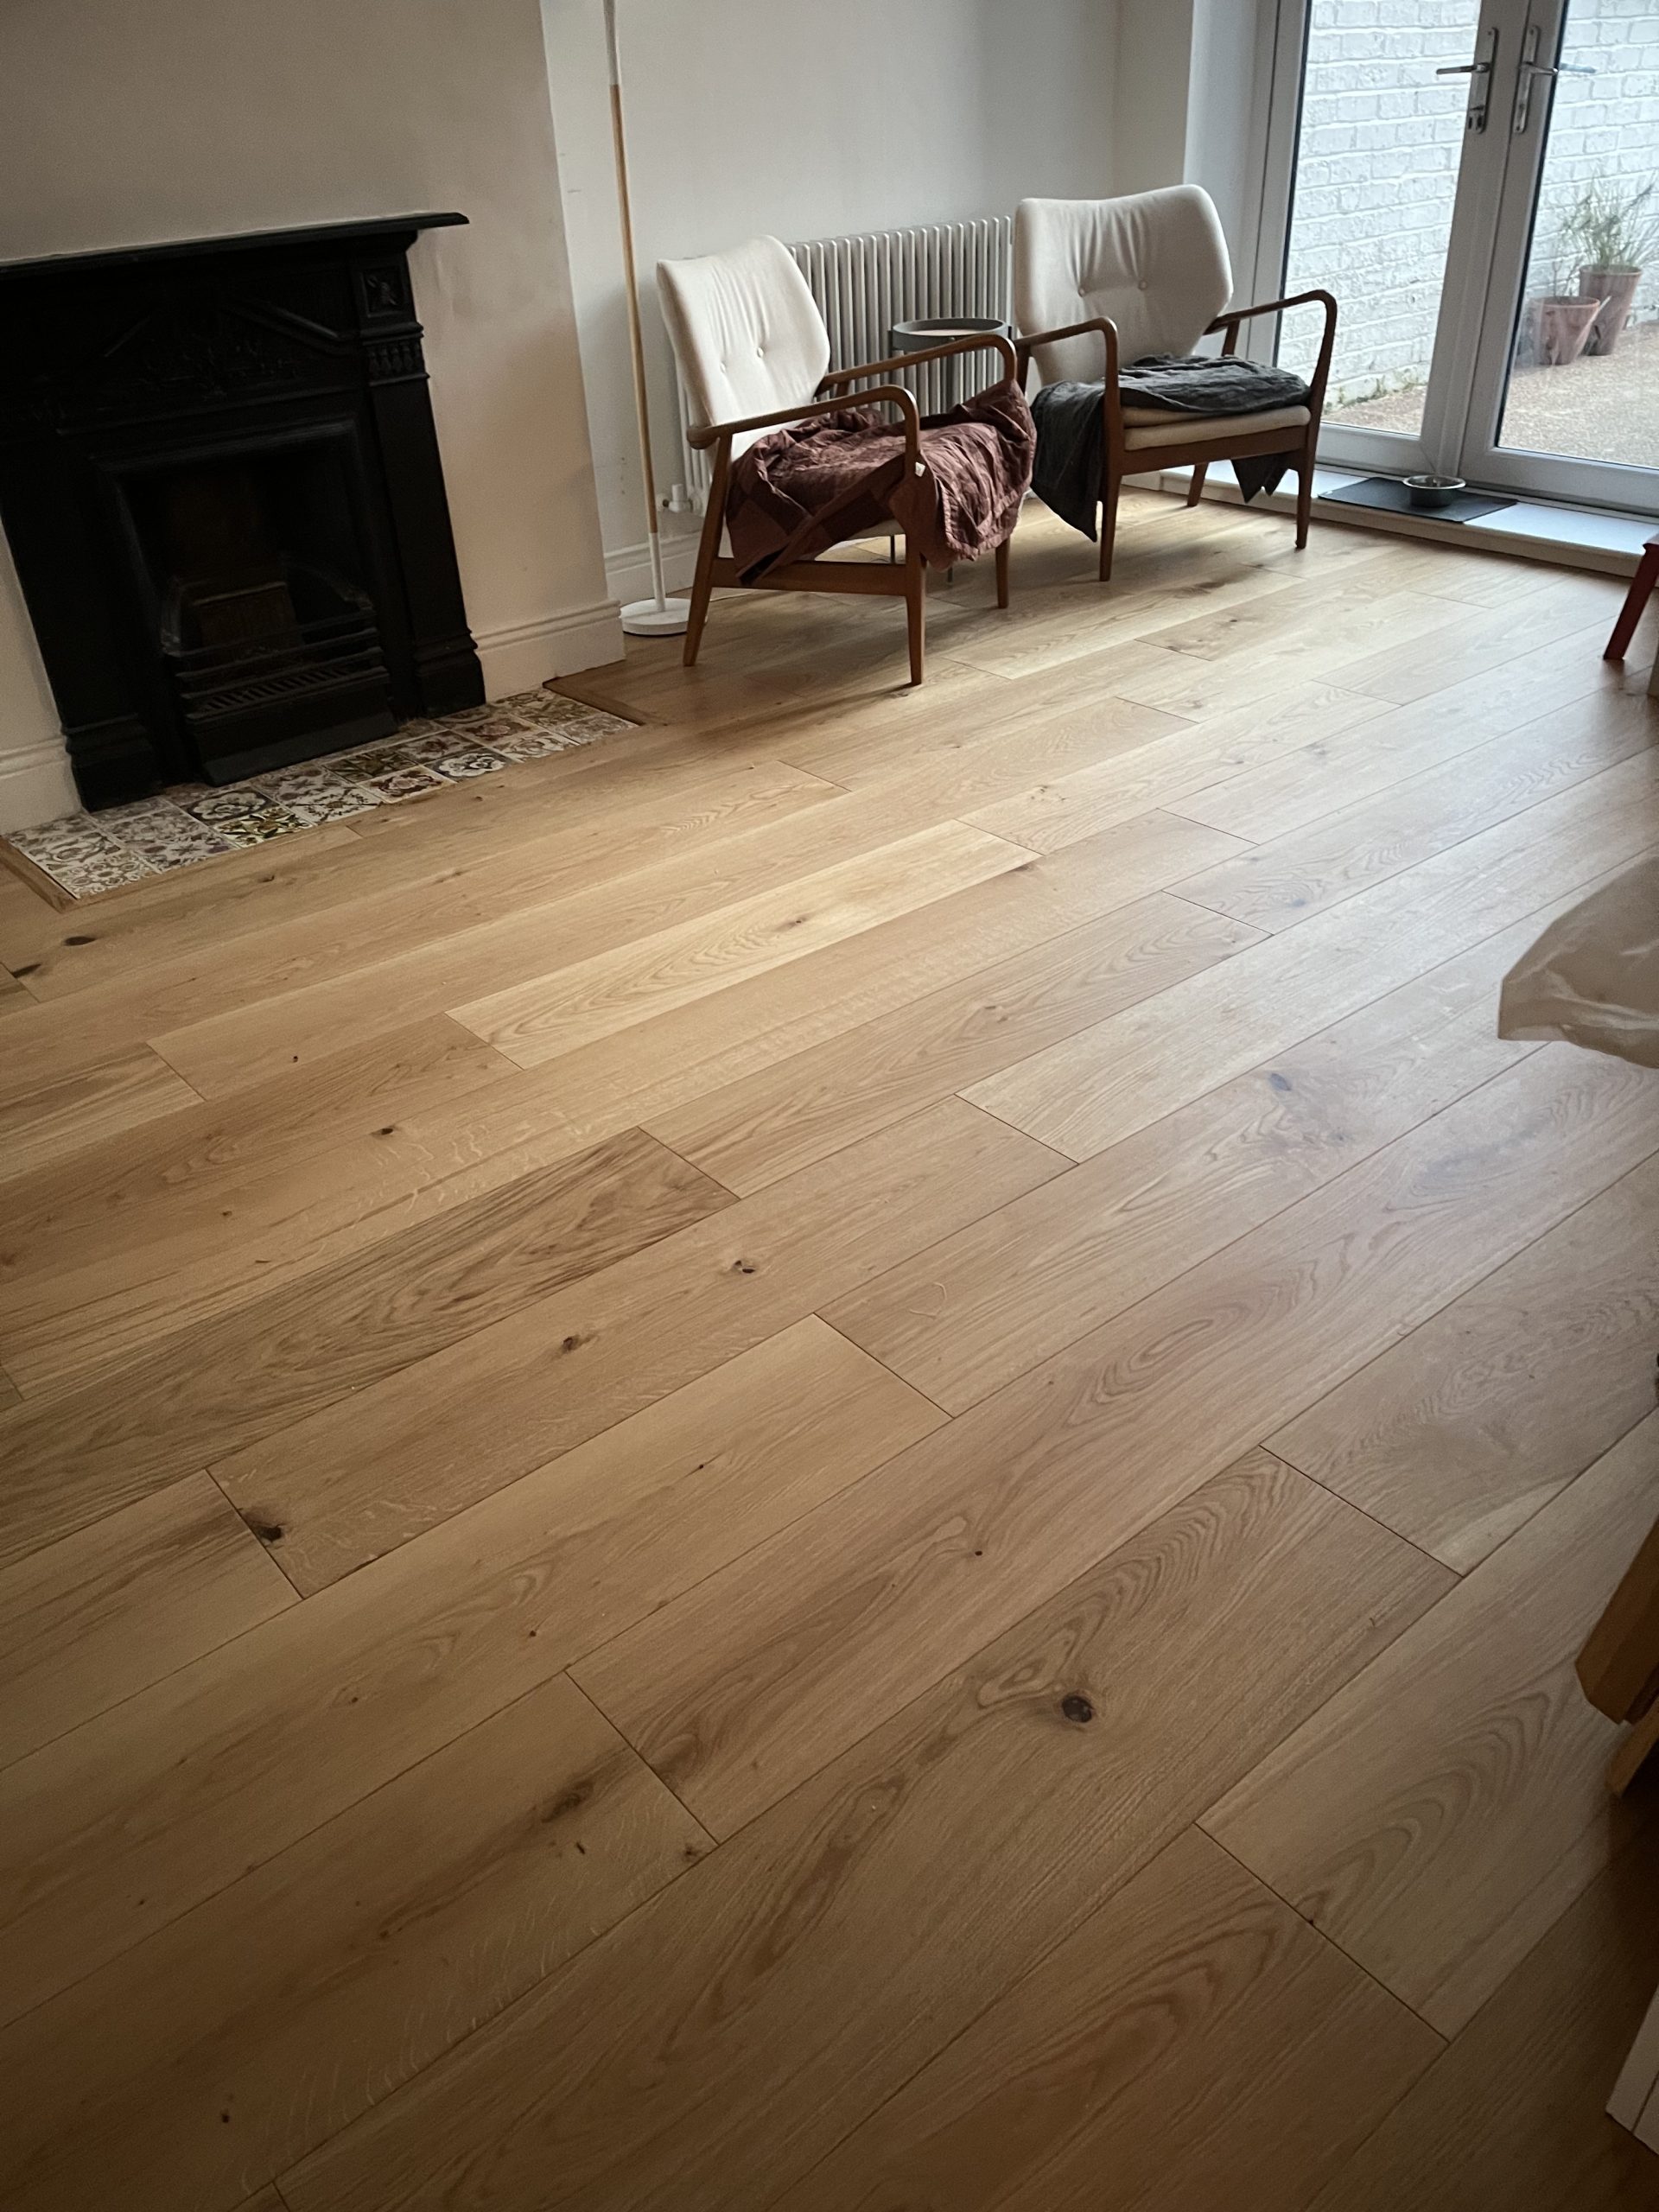
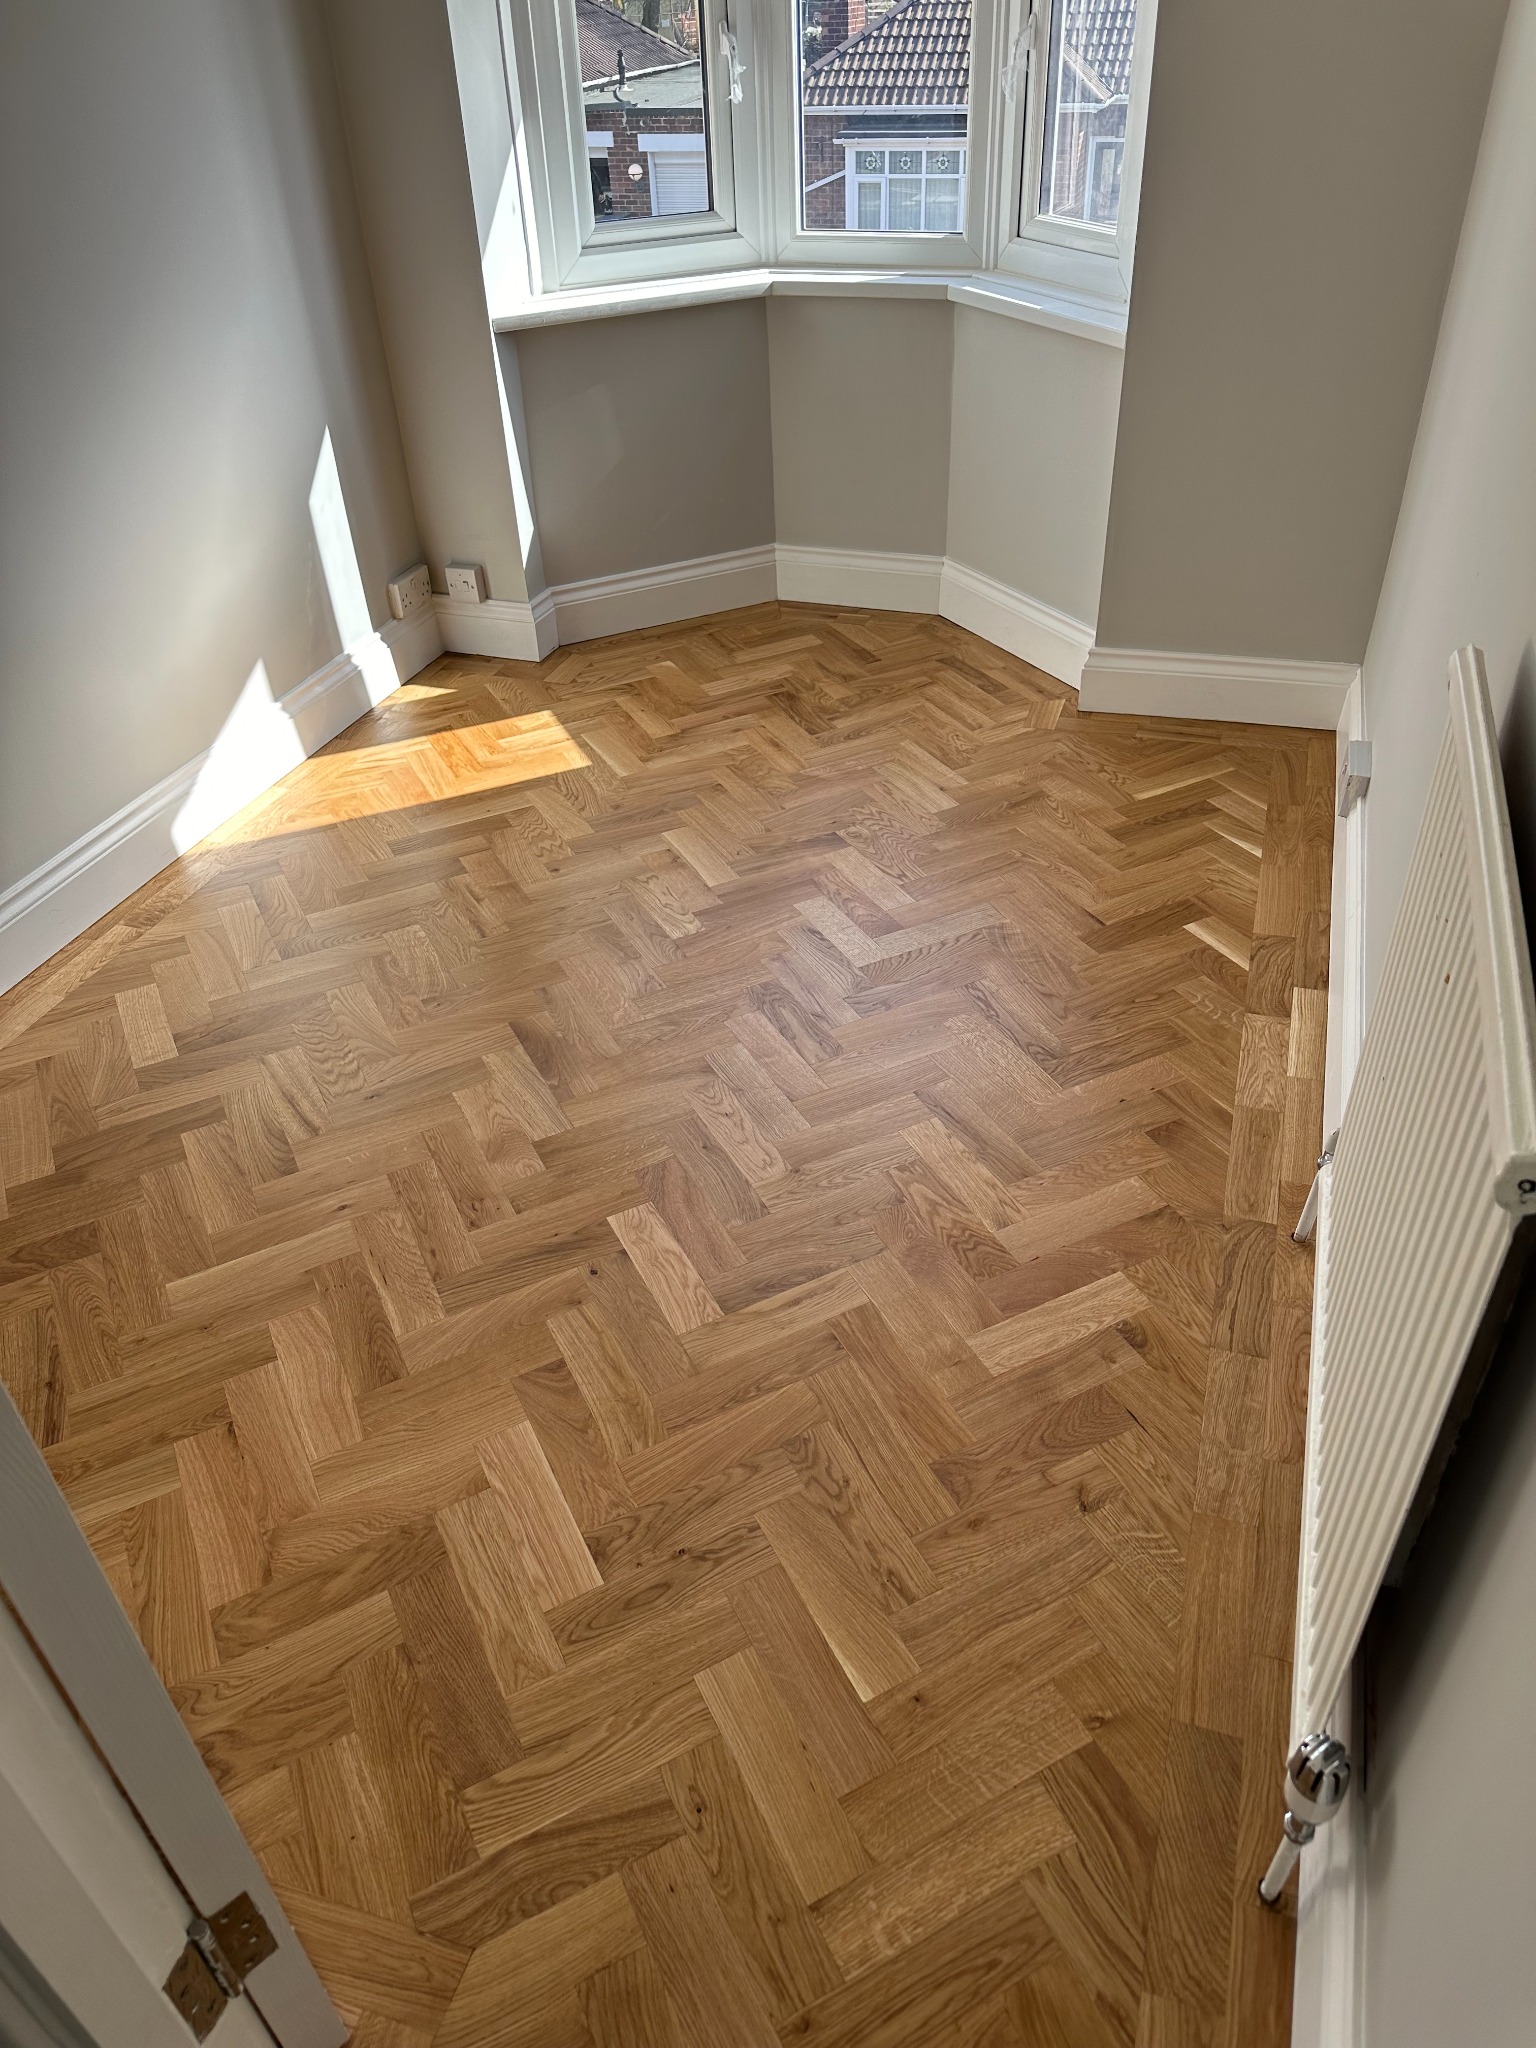
The installation method and level of preparation vary with the floor being created. From wide-plank flooring to herringbone, parquet and more detailed border work, the specification and installation are developed around the timber, the property and the finished result required.
Let’s Talk About Your Floor
You don’t need to have every detail decided before getting in touch. You may already have a timber, pattern or finish in mind, or you may simply want some guidance on what would work best in the room. We’re happy to talk it through with you, look at what you’re trying to achieve and help shape the right approach for the project.